
Peri Peri Chicken Made Easy: 5 Mouthwatering Recipes Including Nando’s London Favorite
Table of Contents
Have you ever experienced that moment when a dish instantly captures your senses? The first time you bite into Peri Peri Chicken, you feel the perfect harmony of spicy heat, tangy citrus, and smoky undertones. It’s the kind of flavor that makes you pause, savor, and immediately crave another bite. For many, Nando’s in London is the benchmark, a place where the Peri Peri experience is perfected. But what if you could bring that magic to your own kitchen?
Cooking Peri Peri Chicken at home isn’t just about following a recipe—it’s about creating an experience. You get to control the spice, the char, the juiciness, and even experiment with flavors to make it truly yours. In this guide, you’ll discover five mouthwatering recipes, including a faithful Nando’s copycat, along with expert tips to help you cook like a pro, even if you’ve never handled chili sauce before. By the end, you’ll have everything you need to master this iconic dish and impress your family or friends with bold, unforgettable flavors.
What is Peri Peri Chicken?
Origins and Cultural Significance
Peri Peri Chicken has a fascinating history that combines flavors from continents. The term “Peri Peri” (also spelled “Piri Piri”) comes from the Swahili word for chili pepper, highlighting its African roots. Portuguese explorers later adopted the fiery chili into their cooking traditions, creating a marinade that blends spice, garlic, citrus, and herbs.
Over the years, this humble dish traveled across the globe, evolving in each region it touched. In South Africa, it became a staple for grilled chicken lovers. In Europe, restaurants began offering it as a signature item. Today, Nando’s has become synonymous with Peri Peri Chicken, particularly in London, where locals and tourists alike flock for its perfectly balanced heat and succulent meat.
The dish’s enduring popularity stems from its versatility and bold flavor profile. Unlike other spicy dishes that overpower your taste buds, Peri Peri Chicken balances heat with tang and smokiness, making it approachable for a wide range of palates.
Why Peri Peri Chicken is Beloved Worldwide
When you think about the world’s most loved chicken dishes, Peri Peri Chicken consistently ranks high. Here’s why it stands out:
- Customizable Heat Levels: From mild to extra hot, you can adjust the chili quantity to suit your taste.
- Juicy and Tender Meat: Proper marination and cooking technique ensure each bite is tender and flavorful.
- Aromatic and Flavorful: Garlic, paprika, citrus, and herbs combine to create layers of flavor that linger.
- Restaurant-Style Appeal at Home: With the right guidance, you can recreate the Nando’s experience without leaving your kitchen.
Fun Fact: Nando’s London serves millions of chicken portions every year, demonstrating the dish’s universal appeal. Yet, once you learn how to make it yourself, you’ll never feel limited by location or restaurant hours—you can enjoy Peri Peri Chicken any time you want.
The Key Takeaway
Before we dive into the recipes, it’s important to understand that the magic of Peri Peri Chicken lies in the marinade and cooking method. It’s not just about following instructions—it’s about layering flavors, allowing time for the chicken to absorb the spicy tang, and using the right techniques to achieve that signature char and juiciness.
By the time you finish this guide, you’ll have all the tools, tips, and insider tricks to make restaurant-quality Peri Peri Chicken right in your kitchen. From traditional Nando’s flavors to creative twists, there’s something here for every cook, whether you’re a beginner or a seasoned pro.
Essential Ingredients for Peri Peri Chicken
Before you even touch the grill or oven, choosing the right ingredients is key. Think of this as the foundation of your flavor masterpiece. Every bite of Peri Peri Chicken you’ll savor later depends on what goes into your marinade and the chicken itself.
Choosing the Right Chicken
When it comes to Peri Peri Chicken, the cut of meat matters. You want juicy, tender chicken that absorbs the spicy, tangy marinade. Here’s what works best:
- Thighs and Drumsticks: These cuts are naturally flavorful and remain moist even when exposed to high heat. When you bite into a perfectly marinated thigh, you’ll notice the juices burst and mingle with the fiery Peri Peri flavors.
- Chicken Breasts: Leaner and quicker to cook, breasts are ideal if you prefer a lighter option. Marinate longer to ensure flavor penetration.
- Whole Chicken: Roasting a whole chicken creates a dramatic centerpiece for a meal. The skin crisps beautifully, while the meat stays juicy inside.
Pro Tip: If you’ve ever bitten into a piece of chicken that tastes bland despite a spicy sauce, it’s often because the marinade didn’t penetrate deep enough. For the juiciest results, score the meat lightly and marinate for at least 3–4 hours—or better yet, overnight.
The Heart of the Dish: Peri Peri Sauce Ingredients
The magic of Peri Peri Chicken lies in the sauce. Balancing heat, acidity, and aromatics is crucial. Here’s a detailed table of ingredients with notes to guide you:
| Ingredient | Quantity | Notes & Tips |
|---|---|---|
| Bird’s Eye Chili | 2–3 | Adjust according to your spice tolerance; you can blend with milder chilies for gradual heat |
| Garlic Cloves | 4–5 | Mince finely or crush to release maximum aroma |
| Lemon Juice | 2 tbsp | Adds a refreshing tang that balances the heat |
| Olive Oil | 3 tbsp | Helps coat the chicken evenly and locks in moisture |
| Paprika | 1 tsp | Optional: adds subtle smokiness without extra heat |
| Salt | ½ tsp | Enhances natural flavors; season carefully |
| Sugar | ½ tsp | Balances acidity and rounds out flavors |
| Fresh Herbs | 1–2 tbsp | Optional: parsley or oregano for extra aroma |
Sensory Tip: When blending these ingredients, imagine the aroma of garlic and chili filling your kitchen. That first whiff tells you your Peri Peri Chicken is on the right track.
Enhancing Flavor: Marinade Techniques
Now that you’ve assembled your ingredients, the next step is marination. This is where patience truly pays off.
- Blend Thoroughly: Combine all sauce ingredients in a blender until smooth. The consistency should be pourable but thick enough to cling to the chicken.
- Coat Generously: Rub the sauce all over the chicken, making sure it seeps into every nook and cranny. Imagine each piece soaking up the fiery, tangy goodness.
- Time is Flavor: Let the chicken marinate for at least 3–4 hours. Overnight marination will give the deepest flavor penetration.
- Basting Matters: If you’re grilling or baking, reserve a small portion of sauce to baste the chicken midway. This adds layers of flavor and helps achieve that irresistible caramelized finish.
Personal Tip: When I first started making Peri Peri Chicken at home, I underestimated the power of overnight marination. The result was good, but the next day, after letting it sit, the chicken practically melted in your mouth with bold, layered flavors. That extra time is what separates a “good” Peri Peri Chicken from a “mind-blowingly delicious” one.
Optional Flavor Boosters
- Smoky Twist: Add a pinch of smoked paprika or char the chicken lightly on a grill.
- Citrus Kick: Include extra lemon zest or a splash of orange juice for a fruity tang.
- Sweet Heat: Honey or brown sugar can balance extremely spicy marinades without overpowering the sauce.
By carefully selecting ingredients and taking the time to marinate, you’re setting the stage for five unforgettable Peri Peri Chicken recipes. Each recipe later in this guide will build upon this foundation, with unique twists, cooking techniques, and flavor profiles.
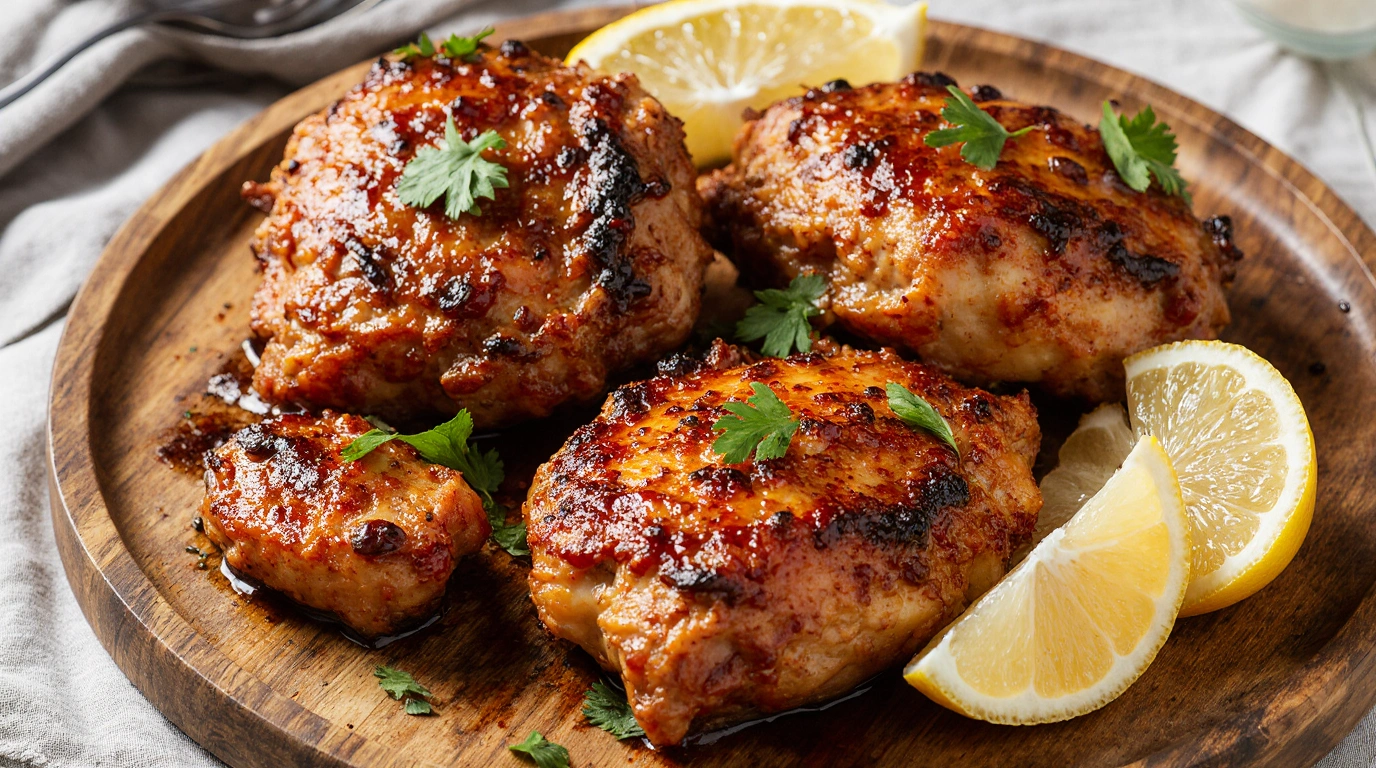
1. Classic Nando’s Copycat Peri Peri Chicken
If you’ve ever wondered how to recreate the famous Nando’s flavor at home, this recipe is your golden ticket. By following this step-by-step guide, you’ll achieve the same juicy, smoky, and spicy chicken that keeps fans coming back in London.
Ingredients Table
| Ingredient | Quantity | Notes & Tips |
|---|---|---|
| Chicken Thighs (skin-on) | 4 | Skin helps achieve crispiness while keeping meat juicy |
| Bird’s Eye Chili | 2–3 | Adjust based on your spice tolerance |
| Garlic Cloves | 3 | Minced for maximum aroma |
| Lemon Juice | 2 tbsp | Freshly squeezed for tangy brightness |
| Olive Oil | 3 tbsp | Locks in moisture and helps coat chicken evenly |
| Paprika | 1 tsp | Adds subtle smokiness |
| Salt & Pepper | To taste | Season evenly before cooking |
Step-by-Step Instructions
- Prepare the Marinade:
In a blender, combine garlic, bird’s eye chili, lemon juice, olive oil, paprika, salt, and pepper. Blend until smooth. Imagine the aroma of garlic and chili filling your kitchen—it’s a sign that flavor is building already. - Marinate the Chicken:
Rub the sauce generously over each chicken thigh, making sure it seeps under the skin and into the meat. Cover and refrigerate for at least 3–4 hours. For best results, let it marinate overnight. You’ll notice the spices fully infuse the chicken, giving it depth and complexity. - Preheat the Oven:
Set your oven to 200°C (400°F). While waiting, take a moment to appreciate the vibrant orange-red hue of the marinade. This visual cue is a sign that your chicken is about to turn into something spectacular. - Bake to Perfection:
Place the marinated thighs on a baking tray lined with foil or a wire rack. Bake for 35–40 minutes, turning halfway through. As the chicken cooks, the skin will crisp and the aroma will fill your kitchen, tempting everyone nearby. - Optional Basting:
About 20 minutes in, brush some reserved marinade over the chicken. This layer adds extra flavor and helps achieve that caramelized, slightly charred finish reminiscent of Nando’s. - Check for Doneness:
Chicken should reach an internal temperature of 75°C (165°F). The skin should be crispy, and the meat should remain juicy. When you cut into it, juices should run clear, carrying the tangy, spicy sauce. - Serve and Enjoy:
Serve hot with lemon wedges or a fresh green salad. The first bite should hit you with spicy warmth, followed by garlic aroma, and finished with a subtle citrus tang.
Sensory Notes and Tips
- Texture: Crispy skin paired with tender meat creates a perfect contrast.
- Flavor: The interplay of spice, garlic, and citrus ensures every bite is layered and exciting.
- Tips for Success:
- Don’t skimp on marination time; it makes all the difference.
- For extra smokiness, finish the chicken under a broiler for 2–3 minutes.
- Pair with lightly roasted vegetables or crispy fries to balance the spice.
Personal Touch: The first time I tried this recipe at home, I didn’t expect my kitchen to smell like a high-end restaurant. The first bite made me pause—I realized I had replicated Nando’s magic without leaving my home. The satisfaction of creating that perfect balance of heat, juiciness, and aroma is unmatched.
Variations
- Extra Hot Version: Add an additional chili or a dash of cayenne powder.
- Smoky Twist: Include smoked paprika or finish on a charcoal grill for authentic smoky notes.
- Lighter Option: Use skinless chicken thighs if you want less fat but retain flavor by basting frequently.
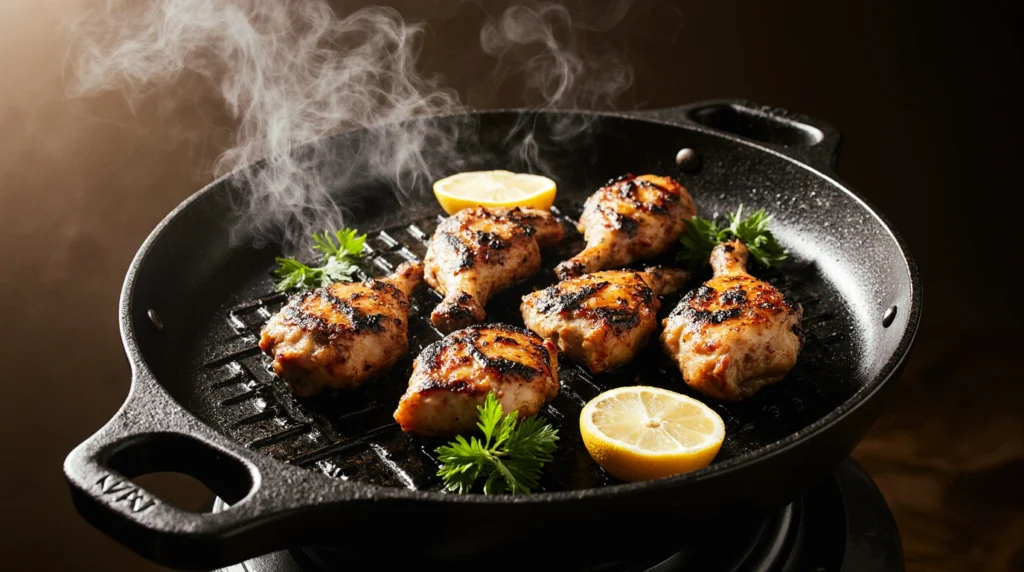
2. Spicy Grilled Peri Peri Chicken
Grilling Peri Peri Chicken is an art form. The char from the grill adds a smoky depth that complements the fiery marinade, creating a dish that tastes like it belongs in a high-end restaurant—even if you’re cooking in your backyard.
Ingredients Table
| Ingredient | Quantity | Notes & Tips |
|---|---|---|
| Chicken Drumsticks or Thighs | 4–6 | Drumsticks are ideal for grilling; thighs remain juicy |
| Bird’s Eye Chili | 3 | Adjust for desired heat |
| Garlic Cloves | 4 | Minced for strong aroma |
| Lemon Juice | 2 tbsp | Adds tang to balance the spice |
| Olive Oil | 3 tbsp | Helps coat chicken and prevent sticking |
| Paprika | 1 tsp | Optional, adds smoky undertones |
| Salt & Pepper | To taste | Season evenly |
Step-by-Step Instructions
- Prepare the Marinade:
Blend garlic, chili, lemon juice, olive oil, paprika, salt, and pepper until smooth. Take a moment to smell it—the garlic and chili will make your kitchen smell vibrant, signaling the bold flavor ahead. - Marinate the Chicken:
Coat the chicken generously with the sauce, ensuring it penetrates under the skin and into the meat. Cover and refrigerate for at least 3 hours, ideally overnight. You’ll notice the chicken gradually taking on a rich, reddish hue as it absorbs the marinade. - Preheat the Grill:
Set your grill to medium-high heat. Oil the grates lightly to prevent sticking. The sizzle when the chicken hits the grill is one of the most satisfying parts of cooking this dish. - Grill the Chicken:
Place chicken on the grill and cook for 20–25 minutes, turning occasionally. Watch as the skin caramelizes and develops a crispy, smoky crust while the meat stays tender inside. - Basting for Extra Flavor:
Midway through cooking, brush additional reserved marinade over the chicken. This step enhances the flavor and gives the skin a glossy, vibrant finish. - Check for Doneness:
Use a meat thermometer to ensure an internal temperature of 75°C (165°F). Juices should run clear, signaling perfectly cooked chicken. - Serve Hot:
Serve with lemon wedges, grilled vegetables, or a simple green salad. The first bite should deliver a burst of spice, followed by tangy brightness, and a smoky finish.
Sensory Notes and Personal Tips
- Smell: The aroma of chili, garlic, and smoky meat will fill your cooking space, making it impossible not to get hungry.
- Texture: Crispy outside, juicy inside—grilling locks in moisture and adds depth.
- Tips for Perfect Grilled Chicken:
- Keep the lid closed while grilling to maintain consistent heat.
- Avoid overcooking; the skin can burn quickly if left unattended.
- Serve immediately to enjoy the crispiness before it softens.
Personal Touch: I remember my first attempt at grilling Peri Peri Chicken. The first bite was electric—the heat from the chilies paired with the smokiness of the grill transported me straight to a summer barbecue in London. Watching friends savor every bite made all the effort worth it.
Variations
- Extra Smoky: Use charcoal or add a few wood chips to create a deeper smoky flavor.
- Tangier Version: Add an extra teaspoon of lemon juice to the marinade.
- Milder Heat: Reduce chilies and pair with a cooling yogurt-based dip.
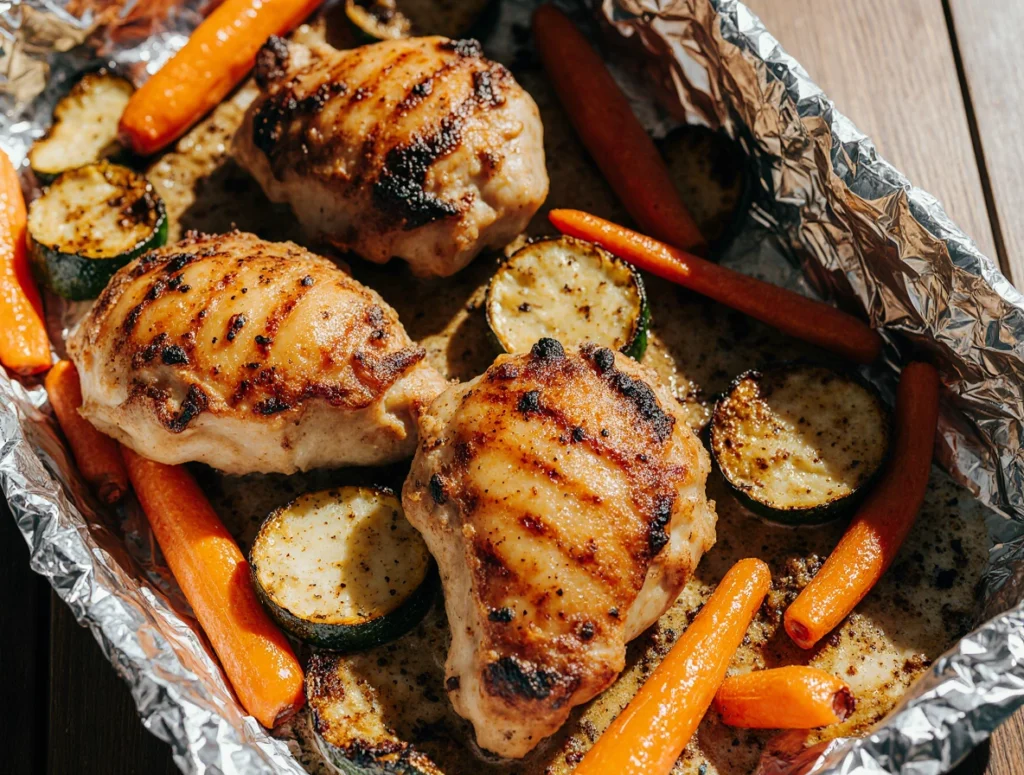
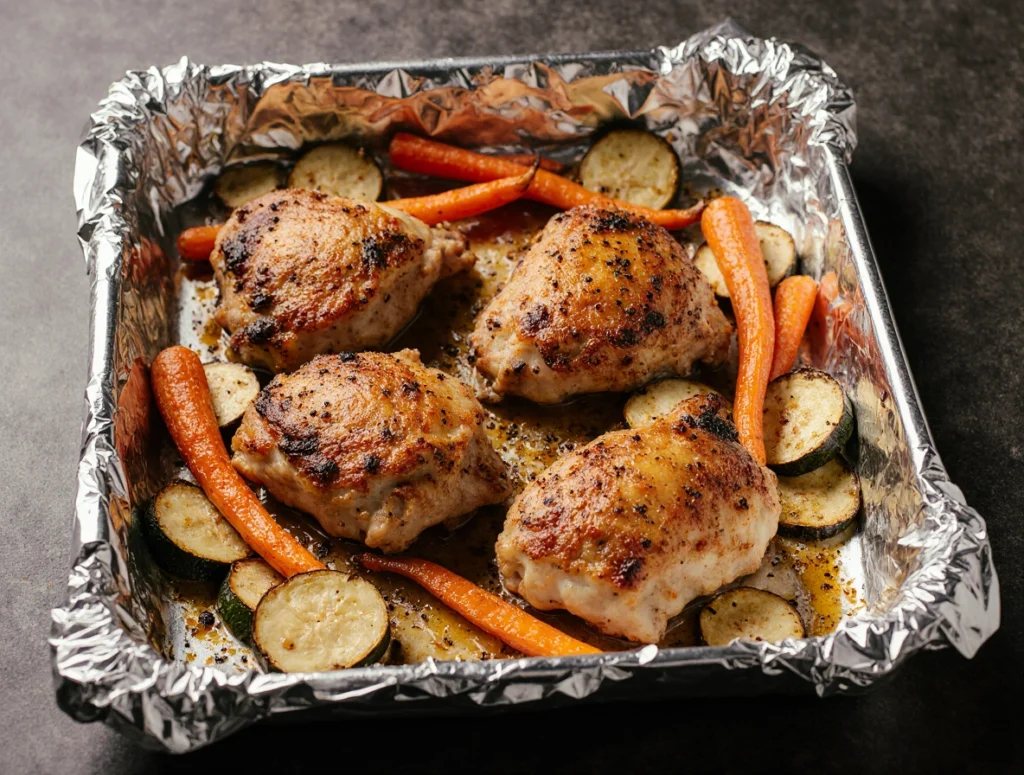
3. Oven-Baked Peri Peri Chicken with Crispy Skin
If you love the idea of juicy, flavorful chicken but prefer the ease of oven cooking, this recipe is perfect for you. Oven-baked Peri Peri Chicken delivers crispy skin, tender meat, and bold flavors without the need for a grill.

Ingredients Table
| Ingredient | Quantity | Notes & Tips |
|---|---|---|
| Chicken Thighs or Drumsticks | 4–6 | Skin-on for maximum crispiness |
| Bird’s Eye Chili | 2–3 | Adjust based on spice preference |
| Garlic Cloves | 4 | Minced for aroma |
| Lemon Juice | 2 tbsp | Freshly squeezed for tang |
| Olive Oil | 3 tbsp | Ensures skin crisps while locking in moisture |
| Paprika | 1 tsp | Optional: adds subtle smokiness |
| Salt & Pepper | To taste | Season evenly |
| Fresh Herbs | 1–2 tbsp | Optional: parsley or oregano for extra aroma |
Step-by-Step Instructions
- Prepare the Marinade:
In a blender or food processor, combine garlic, chili, lemon juice, olive oil, paprika, salt, and pepper. Blend until smooth. Take a moment to inhale the mixture—the aroma of fresh garlic and chilies signals the bold flavors ahead. - Marinate the Chicken:
Rub the marinade generously over each piece of chicken, ensuring it seeps under the skin and into the meat. Cover and refrigerate for 3–4 hours, preferably overnight. This allows the flavors to penetrate deeply, ensuring every bite bursts with the tangy, spicy goodness characteristic of Peri Peri Chicken. - Preheat the Oven:
Set your oven to 220°C (425°F). This high temperature helps the skin crisp beautifully while keeping the meat juicy inside. Line a baking tray with foil or use a wire rack to allow air circulation beneath the chicken. - Bake the Chicken:
Arrange the chicken pieces on the tray, leaving space between each piece. Bake for 30–35 minutes, turning halfway through. The skin should turn golden brown and slightly charred at the edges, creating a delightful crunch. - Basting for Extra Flavor:
About halfway through baking, brush some reserved marinade over the chicken. This step intensifies the flavor and ensures a glossy, appetizing finish. - Check for Doneness:
Use a meat thermometer to check the internal temperature—it should reach 75°C (165°F). The juices should run clear, and the chicken should be firm yet juicy. - Serve and Enjoy:
Serve hot with a side of roasted vegetables, mashed potatoes, or a crisp green salad. The first bite should hit you with spicy warmth, tangy brightness, and savory depth, while the crispy skin provides a satisfying texture contrast.
Sensory Notes and Personal Tips
- Texture: The high-heat oven ensures the skin becomes irresistibly crispy while locking in juiciness.
- Flavor: The combination of chili, garlic, and lemon creates layers of heat, tang, and aromatic depth.
- Tips for Success:
- Preheating the oven is critical for crisp skin.
- Avoid overcrowding the tray; air circulation is key.
- Let the chicken rest for 5 minutes after baking to retain juices.
Personal Touch: The first time I baked Peri Peri Chicken in my oven, I was amazed by the crispy skin and the depth of flavor that developed even without a grill. The aroma alone filled my kitchen with warmth, and the first bite had that restaurant-quality hit of spice and citrus that everyone raves about.
Variations
- Extra Crispy: Finish under the broiler for 2–3 minutes to get an even crunchier skin.
- Mild Heat: Reduce the chili quantity for a gentler, family-friendly version.
- Herb-Infused: Add fresh rosemary or thyme to the marinade for a fragrant twist.
- Serving Ideas: Pair with creamy coleslaw, roasted sweet potatoes, or a side of garlic bread.
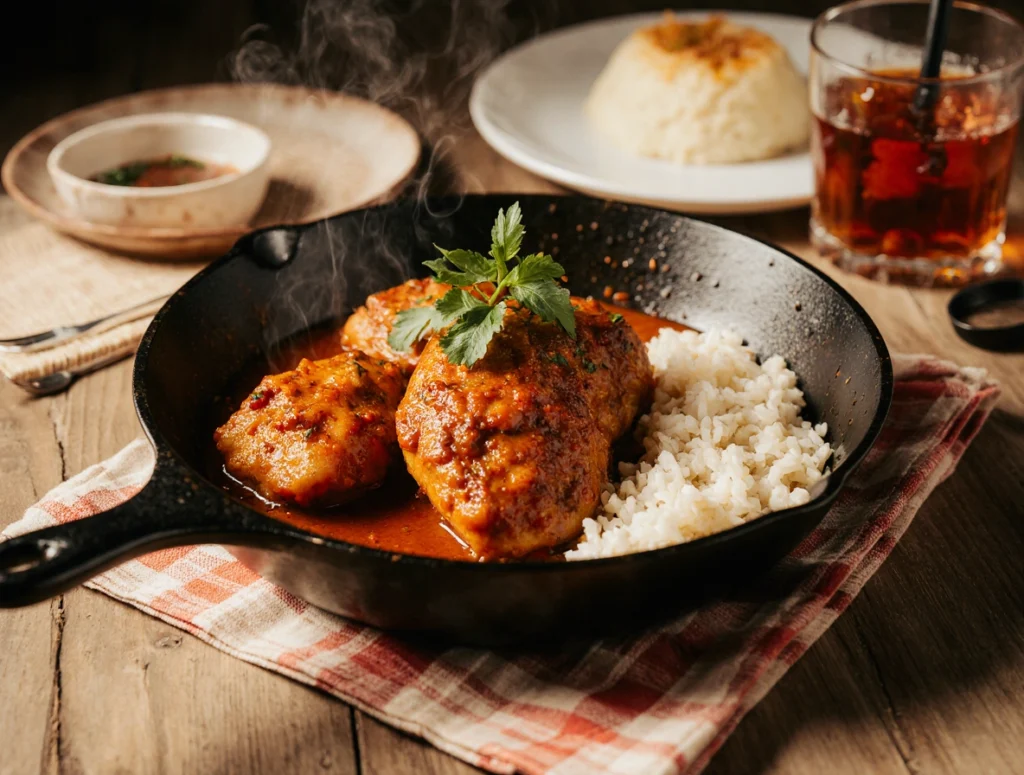
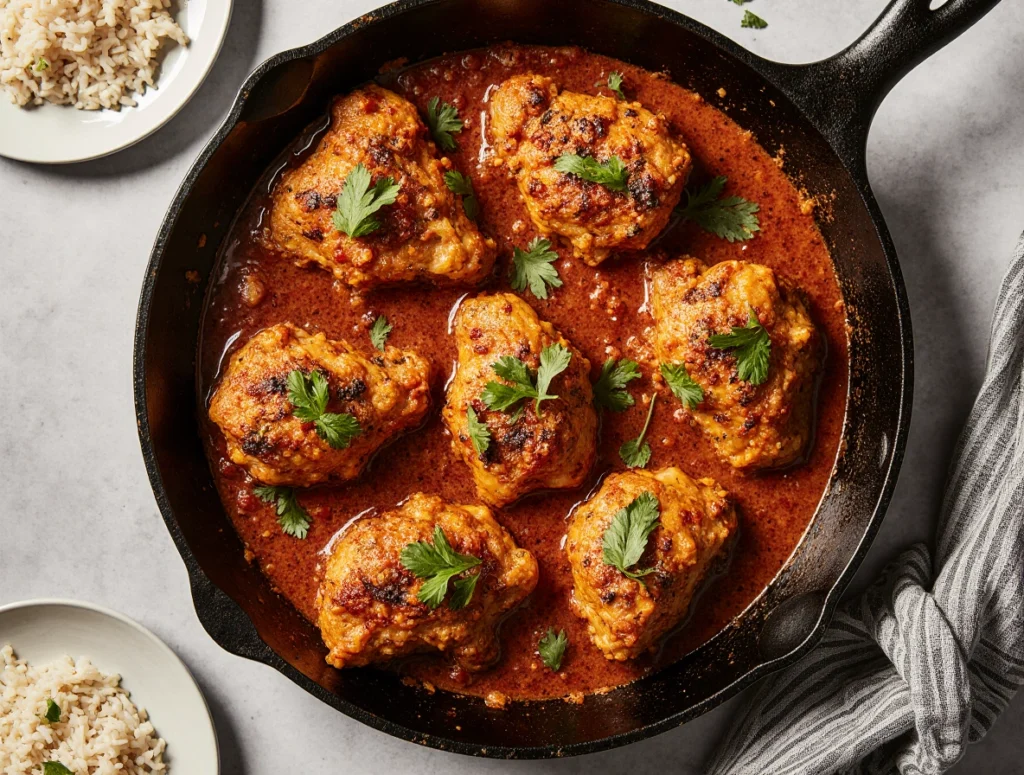
4. Quick Skillet Peri Peri Chicken
Sometimes, you don’t have hours to marinate or grill, but you still want that fiery, flavorful Peri Peri Chicken. This quick skillet method lets you achieve restaurant-quality results in about 30 minutes, perfect for a weekday dinner that feels indulgent yet easy.
Ingredients Table
| Ingredient | Quantity | Notes & Tips |
|---|---|---|
| Chicken Breasts or Thighs | 4 | Thighs are juicier; breasts cook faster |
| Bird’s Eye Chili | 2 | Adjust for spice preference |
| Garlic Cloves | 3 | Minced for flavor |
| Lemon Juice | 2 tbsp | Adds tangy brightness |
| Olive Oil | 3 tbsp | Prevents sticking and enhances flavor |
| Paprika | 1 tsp | Optional: for smoky notes |
| Salt & Pepper | To taste | Season evenly |
| Fresh Herbs | 1 tbsp | Optional: parsley or coriander for garnish |
Step-by-Step Instructions
- Prepare the Quick Marinade:
In a small bowl, mix garlic, chili, lemon juice, olive oil, paprika, salt, and pepper. Unlike the longer recipes, this quick version doesn’t need hours of marination. Just coat the chicken generously and let it sit for 10–15 minutes while you heat the skillet. - Preheat Your Skillet:
Heat a large non-stick or cast-iron skillet over medium-high heat. Add a teaspoon of olive oil to prevent sticking. When the pan is hot, the sizzle will signal it’s ready—a satisfying auditory cue that flavor is about to develop. - Cook the Chicken:
Place the chicken in the skillet, leaving a little space between pieces. Cook for 6–8 minutes per side, depending on thickness. You’ll notice the outside developing a light golden crust, locking in the spicy, tangy flavors. - Baste Mid-Cooking:
Spoon a little of the marinade over the chicken halfway through cooking. This ensures each bite is coated with bold Peri Peri flavor and helps maintain moisture. - Check for Doneness:
The internal temperature should reach 75°C (165°F). The chicken should be firm, juicy, and slightly glossy from the marinade. Cut into a piece—the meat should be tender, with a mild steam of aromatic heat rising. - Serve Immediately:
Garnish with fresh herbs and a squeeze of lemon. Pair with steamed vegetables, a quick salad, or even fluffy rice. The first bite delivers a bright, spicy, garlicky punch, followed by subtle smokiness from the paprika.
Sensory Notes and Personal Tips
- Smell: The aroma of chili, garlic, and sizzling chicken instantly awakens your appetite.
- Texture: Slightly crisp exterior with juicy interior—perfect for quick skillet cooking.
- Flavor: Tangy, spicy, and garlicky in every bite, with just enough complexity for a weekday dish.
- Tips for Success:
- Avoid overcrowding the skillet; pieces need space to sear properly.
- Adjust spice to taste, adding more chili if you crave heat.
- Rest the chicken for 2 minutes before slicing to retain juices.
Personal Touch: On busy nights, this recipe has saved me countless times. One evening, I had only 30 minutes to cook dinner, and this skillet method delivered Peri Peri Chicken that tasted as if it had simmered for hours. Watching my family devour it in seconds made me a believer in quick, flavorful meals.
Variations
- Extra Spicy: Add ½ tsp cayenne powder or an extra chili.
- Tangier Flavor: Include extra lemon juice or a dash of white wine vinegar in the marinade.
- Smoky Skillet: Add a few drops of smoked paprika oil or sear the chicken in a cast-iron skillet for deeper smokiness.
- Serving Suggestions: Pair with garlic butter green beans, roasted potatoes, or warm pita bread for a complete meal.
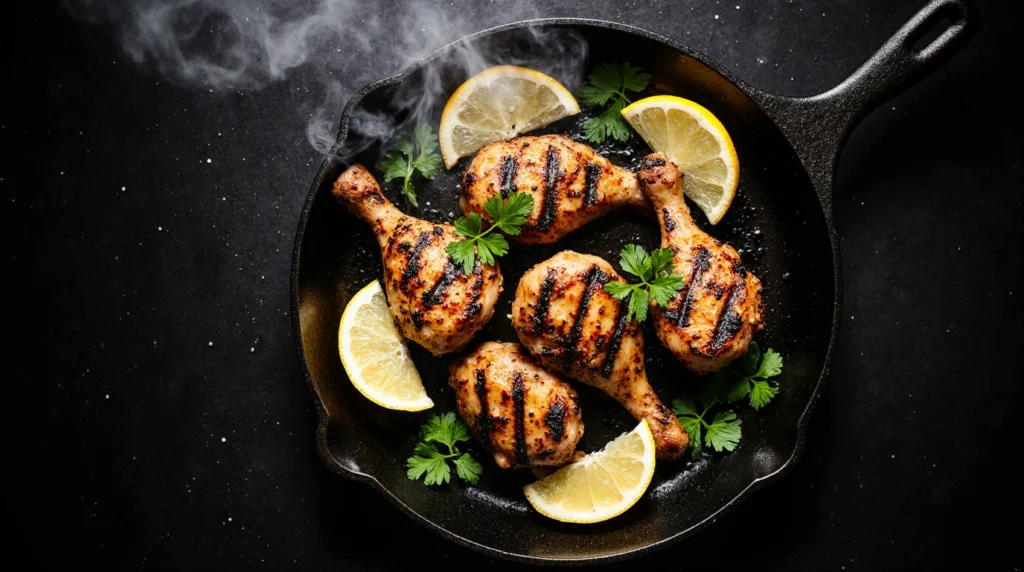
5. Peri Peri Chicken Wings
Peri Peri Chicken Wings are perfect for appetizers, game nights, or casual dinners. They’re small, flavorful, and incredibly addictive, making them ideal for sharing—or sneaking a few extra pieces yourself.
Ingredients Table
| Ingredient | Quantity | Notes & Tips |
|---|---|---|
| Chicken Wings | 12–16 | Split into drumettes and wingettes for even cooking |
| Bird’s Eye Chili | 2–3 | Adjust heat to taste |
| Garlic Cloves | 3–4 | Minced for maximum flavor |
| Lemon Juice | 2 tbsp | Brightens and balances spice |
| Olive Oil | 2–3 tbsp | Helps wings crisp while baking |
| Paprika | 1 tsp | Optional, adds smoky depth |
| Salt & Pepper | To taste | Season evenly |
| Honey | 1 tsp | Optional: balances heat with sweetness |
Step-by-Step Instructions
- Prepare the Marinade:
In a small bowl, mix minced garlic, chili, lemon juice, olive oil, paprika, salt, pepper, and optional honey. The aroma of garlic and citrus alone is enough to make your mouth water in anticipation. - Marinate the Wings:
Toss the chicken wings thoroughly in the marinade. Cover and refrigerate for at least 2 hours, or overnight for deeper flavor penetration. Even a short marination will infuse the wings with tangy, spicy goodness. - Preheat the Oven or Grill:
For oven-baking, preheat to 200°C (400°F). If grilling, prepare medium-high heat and lightly oil the grates. - Cook the Wings:
- Oven Method: Place wings on a foil-lined tray or wire rack for 25–30 minutes, turning halfway.
- Grill Method: Place wings on the grill for 20–25 minutes, turning occasionally. Watch as the edges caramelize and char slightly—this is where flavor peaks.
- Optional Basting:
Brush wings with reserved marinade halfway through cooking for extra gloss and heat. - Check for Doneness:
Chicken wings are done when the meat near the bone is firm, the juices run clear, and the exterior is slightly crispy. - Serve Hot:
Serve with lemon wedges, a cooling yogurt dip, or a fresh salad. The first bite should give a burst of heat, tangy zing, and garlicky aroma, followed by a subtle sweetness if honey is added.
Sensory Notes and Personal Tips
- Texture: Crispy outside, tender inside. Wings are the perfect vessel for bold Peri Peri flavors.
- Flavor: Spicy, tangy, and aromatic, with subtle smokiness if paprika is used.
- Tips for Success:
- Use a wire rack when baking for maximum crispiness.
- Adjust chilies for desired heat; wings tolerate higher spice levels well.
- Serve immediately—wings lose their crispness as they cool.
Personal Touch: These wings became my go-to recipe for weekend movie nights. The first bite is electric—the tang and spice hit instantly, making it impossible to eat just one. Sharing them with friends always earns compliments and requests for seconds.
Variations
- Extra Hot Wings: Add cayenne powder or finely chopped fresh chilies.
- Sweet and Spicy: Increase honey slightly for a glaze that balances the heat.
- Smoky Grill Flavor: Finish on a charcoal grill or add a few drops of smoked paprika oil.
- Serving Ideas: Pair with carrot and celery sticks, ranch dip, or even spicy fries for a game-night feast.
Cooking Techniques and Tips for Perfect Peri Peri Chicken
Cooking Peri Peri Chicken is more than just following a recipe—it’s about mastering techniques that unlock bold, layered flavors. Whether you’re baking, grilling, or pan-searing, understanding these methods ensures your chicken comes out juicy, flavorful, and visually irresistible every time.
1. Marination Mastery
The secret to tender, flavorful Peri Peri Chicken lies in marination. Here’s how to maximize its impact:
- Time Matters: Ideally, marinate chicken for at least 3–4 hours, or overnight for deep flavor penetration. The longer it sits, the more the meat absorbs the tangy, spicy sauce.
- Surface Area is Key: Lightly score the chicken skin or meat with shallow cuts. This allows the marinade to seep deeper, giving every bite consistent flavor.
- Even Coating: Use your hands or a brush to ensure each piece is thoroughly coated. Imagine the aroma of chili, garlic, and lemon filling your kitchen—it’s the first indicator your Peri Peri journey is on track.
- Layered Flavor: Reserve some marinade for basting while cooking. This adds extra depth and gloss to the chicken.
Personal Tip: I once skipped scoring the chicken and noticed the flavor didn’t penetrate as deeply. After that, I always take the extra five minutes—every bite tastes noticeably richer.
2. Grilling Tips
Grilling gives Peri Peri Chicken its signature smoky flavor and slightly charred crust.
- Preheat Properly: Medium-high heat is ideal. Too low, and the chicken cooks unevenly; too high, and the exterior burns before the inside is cooked.
- Oil the Grates: Lightly brush the grates with olive oil to prevent sticking.
- Turn Often: Turn chicken every 5–7 minutes to cook evenly and prevent burning.
- Basting: Brush reserved marinade on midway through for extra flavor and moisture.
Sensory Note: The moment the chicken hits the grill, you’ll hear a satisfying sizzle. The smell of chili and garlic searing is one of the best cues that your meal is about to be unforgettable.
3. Baking Tips
Oven-baking is convenient and ensures juicy meat with crispy skin:
- High Heat is Crucial: Bake at 200–220°C (400–425°F) to crisp the skin quickly while locking in juices.
- Use a Wire Rack: This allows air to circulate beneath the chicken, ensuring even crispiness.
- Midway Basting: Brushing extra marinade halfway enhances color and flavor.
- Check Doneness: Use a meat thermometer (75°C / 165°F) to prevent undercooking or dryness.
Personal Tip: When baking, I always let the chicken rest for 5 minutes after removing it from the oven. This step keeps it juicy and allows the flavors to settle.
4. Skillet Cooking
For a quick, flavorful option, skillet cooking is unbeatable:
- Preheat the Pan: Medium-high heat ensures a light sear without sticking.
- Don’t Overcrowd: Give each piece space to sear properly.
- Short Marination Works: Even 10–15 minutes is enough for the flavors to coat the surface.
- Finish with Herbs: Fresh parsley or coriander adds aroma and a visually appealing touch.
Sensory Note: Skillet-cooked Peri Peri Chicken has a slightly caramelized crust that delivers a satisfying crunch while keeping the interior moist.
5. Balancing Heat and Flavor
Peri Peri Chicken is all about layers of flavor:
- Adjust Chilies: Mild, medium, or extra hot—the choice is yours.
- Balance Acidity: Lemon juice or vinegar helps balance the spiciness and enhances the natural flavor of the chicken.
- Optional Sweetness: A touch of honey or sugar balances heat without overpowering the dish.
Pro Tip: Taste your marinade before applying it to the chicken. This small step ensures the spice, tang, and sweetness are in perfect harmony for your palate.
Summary
Mastering these techniques ensures every piece of chicken you serve:
- Has juicy, tender meat
- Features a crispy, flavorful exterior
- Delivers balanced heat and tang in every bite
- Looks visually appealing for presentation
Personal Touch: The first time I combined proper marination with the right cooking method, the result was transformative. Friends and family couldn’t stop complimenting the depth of flavor. It’s proof that understanding technique is just as important as the ingredients themselves.
Frequently Asked Questions (FAQ) About Peri Peri Chicken
1. What is the secret to making Peri Peri Chicken juicy?
The secret lies in marination and cooking technique. Allow the chicken to marinate for several hours or overnight so the flavors penetrate deeply. Cook at the right temperature—grilling or baking at medium-high heat ensures the exterior crisps while the inside remains juicy. Resting the chicken for 5 minutes after cooking also locks in the juices.
2. Can I make Peri Peri Chicken less spicy?
Absolutely. You can reduce the number of bird’s eye chilies or substitute them with milder chili varieties. Adding a touch of honey or extra lemon juice can also balance the heat while maintaining flavor depth. Even with mild spice, the dish remains aromatic and flavorful.
3. What cuts of chicken work best for Peri Peri recipes?
Thighs and drumsticks are ideal for juiciness and flavor absorption. Chicken breasts are leaner and cook faster but require careful basting to avoid dryness. Whole chickens are perfect for a family-style meal with crispy skin and tender meat.
4. Can I make Peri Peri Chicken ahead of time?
Yes! Marinate the chicken and store it in the refrigerator for up to 24 hours before cooking. You can also cook it in advance and reheat in the oven, basting with leftover marinade to retain moisture and flavor. This makes it convenient for meal prep or entertaining guests.
5. What are the best sides for Peri Peri Chicken?
Peri Peri Chicken pairs beautifully with:
- Roasted or mashed potatoes for a hearty, comforting side
- Fresh salads to balance the spice with crispness
- Grilled vegetables for a smoky, flavorful complement
- Rice or couscous to soak up extra marinade or sauce
6. Can I make Peri Peri Chicken in an air fryer?
Yes, air frying is a quick, convenient method that produces crispy skin and juicy meat. Cook at 180–200°C (360–400°F) for 20–25 minutes, turning halfway. Air frying also reduces the amount of oil needed, making it a healthier alternative.
Conclusion: Mastering Peri Peri Chicken at Home
Cooking Peri Peri Chicken at home is more than just preparing a meal—it’s an experience. From the fiery aroma of garlic and chili to the crispy, golden skin and juicy, tender meat, every step is a chance to bring bold, restaurant-quality flavors to your table.
By following these five recipes—from Nando’s copycat classic to quick skillet wings—you now have the knowledge and techniques to impress your friends, family, or even just yourself. Remember: marination, proper cooking method, and attention to detail are the keys to success.
Your Next Steps:
- Experiment with spice levels to make the dish your own.
- Pair your chicken with creative sides to elevate the meal.
- Share your creations with friends and family—they’ll be asking for seconds.
With the tips, tricks, and detailed recipes in this guide, you now have everything you need to become a Peri Peri Chicken master at home. Don’t wait—fire up your oven, skillet, or grill, and create your first mouthwatering Peri Peri Chicken today!