

Easy Ezekiel Bread Recipe for Beginners: Your Step-by-Step Guide to Healthy Homemade Bread
Table of Contents
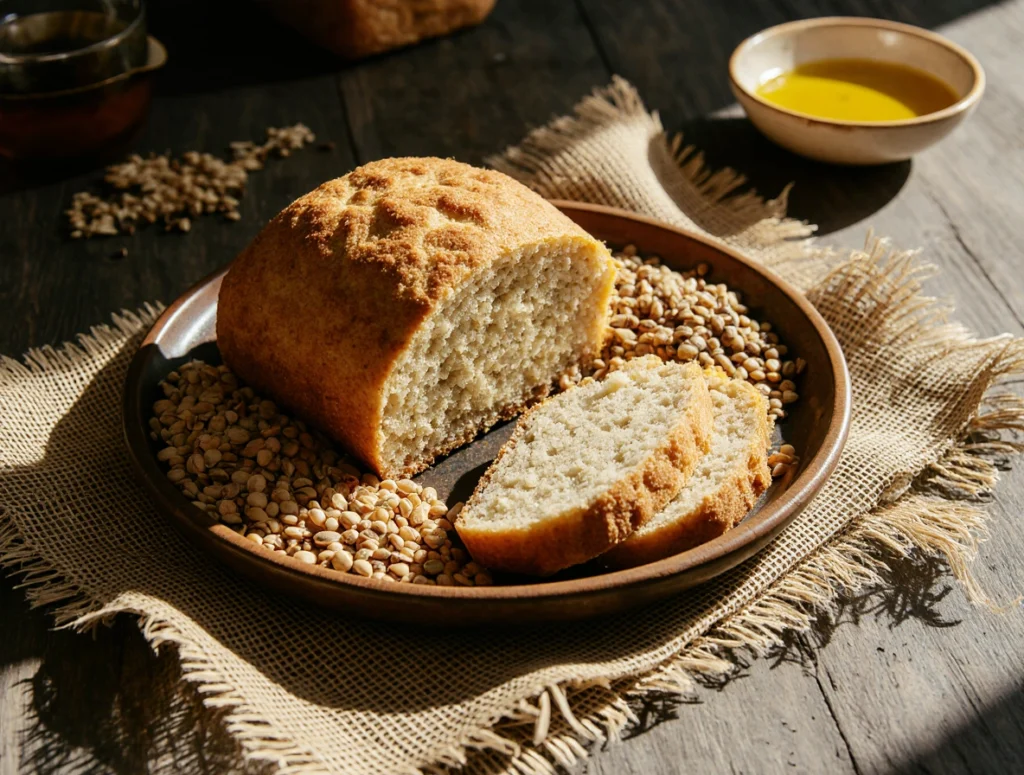
Baking bread at home can be one of the most satisfying experiences, especially when it’s wholesome, nourishing, and steeped in tradition. If you’ve ever wanted to make a bread that’s not only delicious but also packed with nutrients, then learning an easy Ezekiel bread recipe for beginners is a perfect place to start. This bread connects you to a rich historical legacy while giving your body the wholesome benefits of sprouted grains.

Whether you’re new to baking or a seasoned kitchen enthusiast, this guide will walk you through every step, from understanding the ingredients to troubleshooting common issues. By the end, you’ll have the confidence to create your own fresh, nutritious loaves right at home.
What Is Ezekiel Bread? Understanding Biblical Bread
Ezekiel bread is a type of sprouted grain bread inspired by the biblical verse Ezekiel 4:9, which describes a combination of grains and legumes baked into a loaf. Unlike traditional bread, which often relies on refined flour, Ezekiel bread uses whole, sprouted grains—including wheat, barley, spelt, millet, and lentils—giving it a unique texture, richer flavor, and enhanced nutritional profile.
History and Origins
The origins of Ezekiel bread trace back to ancient biblical times. The scripture emphasizes a blend of grains for sustenance, highlighting a wholesome, plant-based diet long before modern nutrition science existed. By baking bread from these sprouted grains, you’re not only enjoying a nutritious loaf but also connecting with a historical and spiritual tradition that has lasted thousands of years.
Nutritional Benefits
Sprouting grains unlocks a host of nutrients, making Ezekiel bread significantly healthier than standard bread. Some key benefits include:
- High protein content: Sprouted grains provide complete proteins, essential for muscle repair and overall health.
- Rich in fiber: Supports healthy digestion and helps maintain steady blood sugar levels.
- Packed with vitamins and minerals: Sprouting increases bioavailability of B vitamins, iron, and magnesium.
- No added sugar: A naturally wholesome option for a healthy diet.
Nutrient Comparison Table:
| Nutrient | Ezekiel Bread | Regular Whole Wheat Bread |
|---|---|---|
| Protein | 4–5g per slice | 3g per slice |
| Fiber | 3–4g per slice | 2g per slice |
| Sugar | 0g | 3–4g |
Incorporating Ezekiel bread into your diet can help you feel fuller for longer, provide sustained energy throughout the day, and contribute to better overall wellness.
By understanding its historical significance and nutritional advantages, you’re better prepared to appreciate the effort that goes into making this wholesome bread at home.
Essential Ingredients for Easy Ezekiel Bread
Creating Ezekiel bread at home starts with understanding its core ingredients. This bread is unique because it relies on sprouted grains and legumes, which not only boost nutrition but also contribute to its distinctive flavor and texture.

Key Ingredients
To make a classic Ezekiel bread, you will need:
- Sprouted Wheat: Forms the base of the bread and provides essential proteins.
- Sprouted Barley: Adds depth of flavor and extra fiber.
- Sprouted Lentils: Contributes plant-based protein and a slight nutty taste.
- Sprouted Millet: Helps lighten the texture while keeping it hearty.
- Sprouted Spelt: Enhances flavor complexity and adds chewiness.
- Water: Lukewarm, to activate the yeast.
- Yeast: Active dry yeast helps the dough rise.
- Olive Oil (optional): Adds moisture and richness.
- Salt: Enhances overall flavor.
Ingredient Tips for Beginners
- Sprouted Grains: You can buy pre-sprouted grains at health food stores or sprout your own at home using jars or trays. Freshly sprouted grains often have a more vibrant flavor.
- Storage: Keep sprouted grains refrigerated to maintain freshness and prevent spoilage.
- Substitutions: While minor tweaks are possible, using the traditional combination ensures authentic flavor and texture.
Ingredients Table for Easy Reference
| Ingredient | Quantity | Notes |
|---|---|---|
| Sprouted Wheat | 1 cup | Fresh or store-bought |
| Sprouted Barley | 1/4 cup | Optional for texture |
| Lentils (sprouted) | 2 tbsp | Adds protein |
| Millet (sprouted) | 2 tbsp | Provides light texture |
| Water | 1 ½ cups | Lukewarm for yeast activation |
| Yeast | 2 tsp | Active dry yeast |
| Olive Oil | 2 tbsp | Optional |
| Salt | 1 tsp | Enhances flavor |
Using these ingredients ensures your Ezekiel bread will be nutritious, flavorful, and perfectly textured, even if you’re a beginner baker.

Step-by-Step Easy Ezekiel Bread Recipe
Making Ezekiel bread at home might seem intimidating at first, but by following these step-by-step instructions, you’ll find it’s both approachable and rewarding. This guide ensures your bread comes out perfectly every time, even if you’re a beginner.
Step 1: Preparing the Dough
- Combine Sprouted Grains and Water
- In a large mixing bowl, combine all your sprouted grains with 1½ cups of lukewarm water.
- Let the mixture sit for 5–10 minutes to hydrate the grains.
- Activate the Yeast
- In a small bowl, mix 2 teaspoons of active dry yeast with a teaspoon of sugar (optional) and a little warm water.
- Let it foam for 5–10 minutes to ensure your yeast is active.
- Mix and Knead
- Add the activated yeast, salt, and olive oil to the grain mixture.
- Knead the dough for 8–10 minutes until it becomes smooth and elastic.
- Tip: If the dough feels too sticky, sprinkle in a little extra flour gradually.
Step 2: First Rise
- Place the dough in a lightly oiled bowl and cover it with a clean cloth or plastic wrap.
- Let it rise in a warm, draft-free area for 1–2 hours, until it doubles in size.
- Tip: If your kitchen is cool, preheat the oven to 100°F (38°C), turn it off, and place the dough inside to rise.
Step 3: Shaping and Second Rise
- Punch down the dough gently to remove excess air.
- Shape the dough into a loaf or rolls.
- Optional: Sprinkle seeds like sesame, sunflower, or pumpkin on top for added texture and flavor.
- Cover and let it rise a second time for 30–45 minutes.
Step 4: Baking
- Preheat your oven to 350°F (175°C).
- Place the loaf on a parchment-lined baking tray or in a greased bread pan.
- Bake for 35–40 minutes, or until the crust is golden brown and firm.
- Check for doneness: Tap the bottom of the loaf—it should sound hollow.
Step 5: Cooling and Serving
- Remove the bread from the oven and let it cool completely on a wire rack before slicing.
- This ensures the texture sets properly and prevents a gummy interior.
- Serve fresh, toasted, or use it as a base for sandwiches and hearty breakfasts.
Pro Tips for Beginners
- Use fresh, active yeast to ensure proper rising.
- Sprouted grains absorb more water than regular flour, so adjust hydration carefully.
- Don’t rush the rising times; patience is key to a light and airy loaf.
- For extra flavor, consider lightly toasting the grains before mixing.
Troubleshooting Common Ezekiel Bread Issues
Even with an easy Ezekiel bread recipe, beginners may encounter some challenges. Understanding common issues and their solutions will help you bake perfect, wholesome loaves every time.

1. Dense or Heavy Bread
- Cause: Dough may not have risen enough, or yeast wasn’t fully active.
- Solution:
- Ensure your yeast is fresh and properly activated before mixing.
- Give the dough enough time to rise in a warm, draft-free area.
- Knead thoroughly to develop gluten, which helps the bread rise and hold structure.
2. Crust Too Hard or Thick
- Cause: Oven temperature too high or lack of moisture during baking.
- Solution:
- Bake at 350°F (175°C) for even cooking.
- Place a small pan of water in the oven to create steam and soften the crust.
- Cover the loaf loosely with foil during the last 10 minutes of baking if it browns too quickly.
3. Dough Too Sticky
- Cause: Sprouted grains absorb more water than regular flour, leading to sticky dough.
- Solution:
- Gradually add small amounts of flour while kneading until the dough reaches a smooth, elastic consistency.
- Avoid adding too much flour, as it can make the bread dry and dense.
4. Bread Doesn’t Rise Properly
- Cause: Yeast not activated or dough kept in a cool area.
- Solution:
- Always use lukewarm water to activate yeast (around 100–110°F / 37–43°C).
- Keep the dough in a warm, draft-free environment. If necessary, place the bowl in a slightly warmed oven to help the rise.
5. Gummy or Underbaked Interior
- Cause: Bread removed from oven too early or high moisture content in dough.
- Solution:
- Bake fully until the crust is golden brown and the bottom sounds hollow when tapped.
- Allow the loaf to cool completely on a wire rack before slicing.
Pro Tips to Avoid Issues

- Always measure ingredients carefully, especially water and sprouted grains.
- Use a kitchen scale for precision—sprouted grains can vary in moisture.
- Be patient with rising times; rushing can compromise texture.
- Experiment with small adjustments to water and flour ratios until you find what works best in your kitchen.
This troubleshooting guide ensures that even beginners can confidently bake Ezekiel bread without common pitfalls, resulting in a perfectly textured, nutritious loaf every time.
Variations and Serving Suggestions
Once you’ve mastered the easy Ezekiel bread recipe, you can experiment with variations to suit your taste or make it even more nutritious. This section will also show you creative ways to enjoy your homemade bread.
Flavor Variations
- Nutty Delight
- Add 2–3 tablespoons of chopped walnuts, almonds, or pecans into the dough.
- Provides extra protein, healthy fats, and a satisfying crunch.
- Sweet and Fruity
- Mix in 2–3 tablespoons of raisins, dried cranberries, or chopped dates.
- Perfect for breakfast or a wholesome snack, balancing the earthy flavors of sprouted grains.
- Herbs and Seeds
- Incorporate fresh or dried herbs like rosemary, thyme, or oregano.
- Sprinkle seeds such as sesame, sunflower, or pumpkin on top before baking.
- Adds aroma, texture, and visual appeal.
- Savory Cheese Twist
- Fold in 2–3 tablespoons of shredded cheese like cheddar or parmesan into the dough.
- Creates a savory, slightly tangy loaf ideal for sandwiches or snacks.
Serving Suggestions
- Toast It: Lightly toast slices and top with avocado, almond butter, or hummus for a healthy breakfast or snack.
- Sandwich Base: Use your homemade Ezekiel bread as a base for protein-rich sandwiches, pairing it with turkey, chicken, or plant-based fillings.
- Accompaniment to Meals: Serve slices alongside soups, stews, or salads to add a hearty, nutritious component to lunch or dinner.
- Mini Open-Faced Snacks: Spread cream cheese, nut butter, or mashed avocado, and top with fresh fruit or vegetables for an easy appetizer.
Pro Tips for Enjoying Ezekiel Bread

- Slice bread only when fully cooled to maintain texture.
- Store unused portions in airtight containers or freeze for longer shelf life.
- Toasting Ezekiel bread slightly enhances flavor and makes it easier to spread toppings.
This section not only inspires creative uses for Ezekiel bread but also encourages readers to explore variations that suit their personal taste and dietary needs, making the bread more versatile and enjoyable.
Storage and Shelf Life
Proper storage is key to keeping your homemade Ezekiel bread fresh, flavorful, and safe to eat. Unlike store-bought bread with preservatives, fresh Ezekiel bread is more perishable, so knowing the best storage methods ensures you enjoy every slice.
Storing at Room Temperature
- Store the bread in an airtight container or a bread box to prevent it from drying out.
- Keep it in a cool, dry place, away from direct sunlight.
- At room temperature, your Ezekiel bread will typically last 3–5 days.
Refrigeration
- Refrigerating bread can extend its life slightly, but it may dry out faster than when stored at room temperature.
- Wrap the bread tightly in plastic wrap or foil before placing it in the fridge.
- Use refrigerated bread within 1 week for the best texture and flavor.
Freezing for Long-Term Storage
- Freezing is the best method for maintaining freshness for longer periods.
- Slice the bread before freezing so you can remove only what you need.
- Wrap the slices or loaf tightly in plastic wrap, then place them in a freezer-safe bag or container.
- Frozen Ezekiel bread can last up to 2 months.
- To thaw, leave slices at room temperature for 10–15 minutes or toast directly from frozen.
Pro Tips for Maintaining Freshness
- Avoid storing bread in a damp or warm environment, as this encourages mold growth.
- Only slice the bread when you’re ready to eat it; uncut loaves retain moisture longer.
- Consider freezing portions immediately after baking to lock in flavor and texture.
By following these storage techniques, you can enjoy fresh, nutritious Ezekiel bread anytime without compromising taste or texture.
FAQ – Easy Ezekiel Bread Recipe
This FAQ section addresses the most common questions beginners have about making Ezekiel bread at home. Each answer is designed to provide clear, actionable guidance while naturally including the main keyword for SEO.
Q1: Can I make Ezekiel bread without a bread machine?
Yes! While a bread machine can simplify the process, you can make Ezekiel bread at home entirely by hand. Knead the dough, allow proper rising times, and follow the baking instructions in the recipe. Hand-kneading may take slightly longer, but the results are just as delicious and nutritious.
Q2: How long does Ezekiel bread last?
Freshly baked Ezekiel bread lasts 3–5 days at room temperature when stored in an airtight container. For longer storage, freeze portions for up to 2 months. Always slice only what you need to keep the remaining loaf fresh.
Q3: Is Ezekiel bread gluten-free?
No, Ezekiel bread contains wheat, barley, and spelt, all of which have gluten. It is not suitable for gluten-free diets, but it is packed with sprouted grains, making it more digestible than regular bread for most people.
Q4: Can I substitute sprouted grains with regular grains?
Substituting regular grains is not recommended. Sprouting increases nutrient absorption, improves digestibility, and enhances the bread’s flavor and texture. Using regular grains may result in a denser, less nutritious loaf.
Q5: What are the health benefits of Ezekiel bread?
Ezekiel bread is rich in protein, fiber, and essential vitamins. Its sprouted grains support digestion, provide sustained energy, and help maintain stable blood sugar levels. It’s a wholesome choice for anyone looking to improve their diet naturally.
Include these FAQs at the bottom of your article or as anchor links to improve SEO and user engagement, ensuring readers find answers quickly while keeping your main keyword prominent.
Conclusion
Making your own Ezekiel bread at home is a rewarding experience that nourishes both body and soul. With this easy guide, you can confidently bake a healthy, flavorful loaf that connects you to a centuries-old tradition while boosting your nutrition.
Call-to-Action: Try this easy Ezekiel bread recipe for beginners today. Share your baking experience, experiment with variations, and embrace the joy of homemade, wholesome bread.