
7 Easy Injera Recipe Tips for Perfect Ethiopian Flatbread Every Time
Table of Contents
Imagine the first time you tear into a soft, spongy piece of freshly made Injera, the slightly tangy aroma filling your kitchen, transporting you straight to the heart of Ethiopia. Making Injera at home may feel like a daunting task, but with the right guidance, you can master this traditional Ethiopian flatbread and enjoy it with all your favorite dishes. In this article, you’ll discover 7 easy Injera recipe tips to create perfect flatbread every time, along with detailed instructions, ingredient guidance, and solutions to common problems.
What is Injera? A Brief Introduction

If you’ve ever dined at an Ethiopian restaurant, you’ve probably encountered Injera—the soft, spongy flatbread that forms the foundation of every meal. But what exactly is Injera, and why is it so special?
Injera is a traditional Ethiopian sponge bread, typically made from teff flour, water, and a starter that allows the batter to ferment. Its unique texture and slightly sour flavor set it apart from other flatbreads around the world. Not only is it delicious, but it also serves as an edible utensil, allowing you to scoop up stews, vegetables, and lentils with ease.
By making Injera at home, you gain the satisfaction of creating authentic Ethiopian cuisine while impressing your family and friends with your culinary skills.
Ingredients Needed for the Perfect Injera Recipe
To make perfect Ethiopian Injera, having the right ingredients is crucial. Each component plays a role in achieving that soft, spongy texture and slightly tangy flavor that makes Injera so unique. Here’s what you’ll need:

Essential Ingredients
| Ingredient | Quantity | Notes |
|---|---|---|
| Teff flour | 2 cups | Traditional flour for authentic Injera; gluten-free |
| Water | 2–3 cups | Adjust as needed for batter consistency |
| Starter / Yeast | 1 tsp | Or use previously fermented dough for tanginess |
| Salt | ½ tsp | Optional, enhances flavor |
Tips for Choosing Ingredients
- Teff flour: This is the key ingredient that gives Injera its characteristic flavor and spongy texture. If teff is unavailable, you can substitute with a mix of all-purpose flour and sorghum flour, though the flavor will be slightly different.
- Water: Use room temperature water for proper fermentation. Cold water slows the process, while very hot water can kill the yeast or starter.
- Starter / Yeast: A fermented starter or active dry yeast helps the batter rise and develop the tangy taste typical of Injera.
- Salt: Optional, but a pinch can enhance the overall flavor.
Optional Additions
- Some recipes suggest adding a small amount of all-purpose flour to make the batter easier to handle.
- You can also experiment with spices like fenugreek or coriander for a subtle flavor twist, though traditional Injera is usually plain.
Step-by-Step Injera Recipe Instructions
Creating perfect Injera requires attention to detail, but once you master the technique, it becomes second nature. Here’s how to get it right:
Preparing the Batter
- Mix the flour and water: Combine teff flour with water in a bowl until smooth. The consistency should be pourable but slightly thick.
- Add the starter: Incorporate the yeast or fermented dough. Stir gently to blend without deflating the mixture.
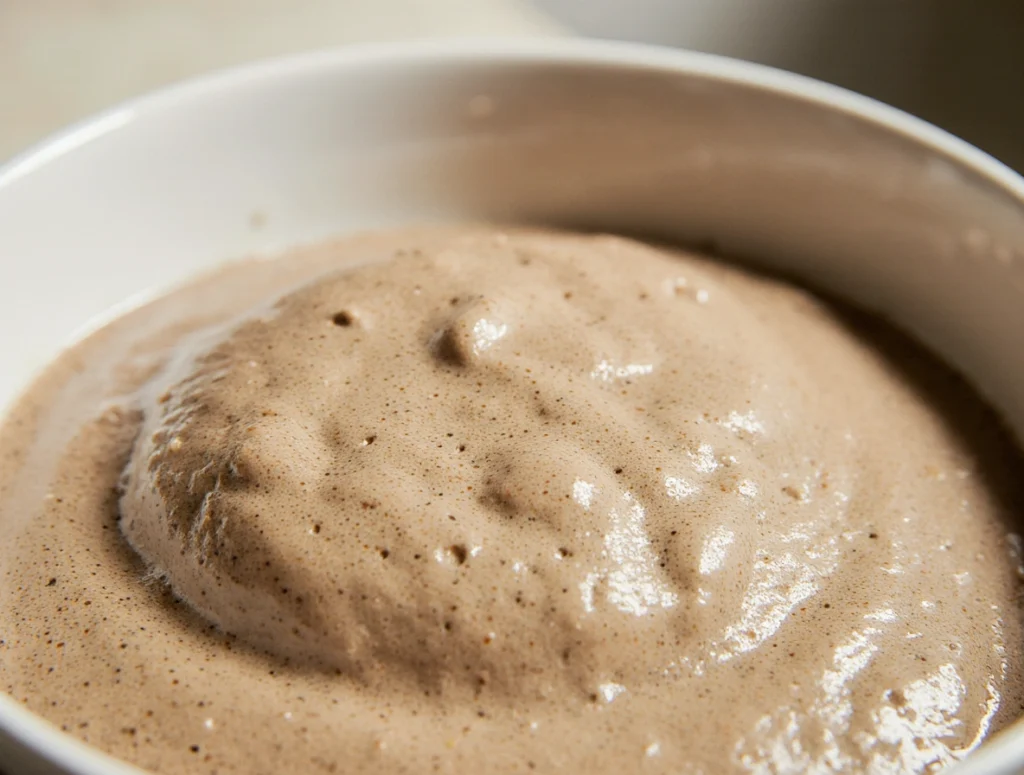
- Ferment: Cover the bowl with a cloth and leave it at room temperature for 24–48 hours. The batter will develop small bubbles and a slightly tangy smell, indicating proper fermentation.
Tips for Perfect Fermentation:
- Warm environments speed up fermentation, while cooler areas slow it down.
- Check the batter daily; bubbles are a sign of healthy fermentation.
Cooking the Injera
Cooking Injera requires a balance of heat and technique.


- Preheat your pan: Use a non-stick or cast-iron skillet over medium heat. Too hot, and the bread will burn; too low, and it will remain soggy.
- Pour the batter: Swirl the batter in a circular motion, covering the entire surface of the pan.
- Cover and cook: Place a lid over the pan. The top will begin to form bubbles and steam. Cook for 2–3 minutes until the surface sets.
- Remove carefully: Use a spatula to lift the edges gently. Let it cool on a clean surface before stacking.
Signs Your Injera is Ready:
- The surface is full of tiny holes
- The bottom is slightly golden, not burnt
- It feels soft and pliable
Serving Suggestions
Once your Injera is cooked, you can enjoy it in a variety of ways:
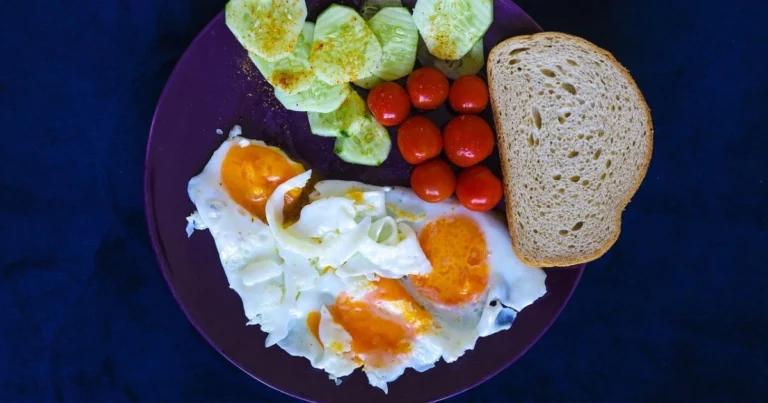
- Traditional: Serve with Ethiopian stews like Doro Wat, Misir Wat, or vegetable sautés.
- Modern twists: Use Injera as a wrap for sandwiches or roll it up with hummus and roasted vegetables.
- Presentation: Stack multiple layers on a large plate, with stews in the center, for an authentic communal dining experience.
7 Easy Injera Recipe Tips for Perfect Flatbread
Making Injera at home can seem intimidating, but these 7 easy tips will help you achieve soft, spongy, and flavorful Ethiopian flatbread every time. Follow these practical suggestions to elevate your Injera-making skills:
- Use High-Quality Teff Flour
- Teff flour is the cornerstone of authentic Injera. Using fresh, organic teff ensures the best flavor and texture.
- If teff is hard to find, you can mix it with sorghum or all-purpose flour, though the taste will be slightly different.
- Allow Proper Fermentation
- Fermentation is key to achieving the signature tangy flavor of Injera.
- Leave your batter at room temperature for 24–48 hours until small bubbles form and it develops a slightly sour aroma.
- Achieve the Perfect Batter Consistency
- The batter should be pourable but thick enough to hold its shape when spread on the pan.
- If it’s too thin, the Injera will tear easily; if too thick, it will be dense.
- Choose the Right Pan
- A non-stick or cast-iron skillet is ideal for cooking Injera evenly without sticking.
- Avoid pans that heat unevenly, as this can cause inconsistent texture.
- Control the Heat
- Cook on medium heat to prevent burning while ensuring the flatbread cooks fully.
- Too high heat will brown the bottom too fast, leaving the top uncooked.
- Cover While Cooling
- After cooking, cover the Injera with a clean cloth or lid to retain moisture.
- This keeps the flatbread soft and pliable, perfect for rolling or stacking.
- Practice Patience
- Injera takes practice to perfect. Don’t be discouraged if the first few attempts aren’t flawless.
- Each batch will improve as you learn the right batter consistency, heat level, and flipping technique.
These tips ensure your Injera is authentic, soft, and full of flavor. Following them consistently will make the process easier and more enjoyable, whether you’re cooking for family, friends, or yourself.
Common Injera Problems and How to Fix Them
Even with careful preparation, things can go wrong. Here’s how to troubleshoot common issues:


Too Dense or Heavy
- Cause: Batter too thick or insufficient fermentation
- Fix: Adjust water-to-flour ratio and extend fermentation time
Tearing While Flipping
- Cause: Pan too hot or batter consistency off
- Fix: Lower heat and ensure batter is smooth and pourable
Sourness Too Strong or Weak
- Cause: Over or under-fermentation
- Fix: Adjust time based on ambient temperature and starter activity
Storage and Shelf Life of Injera
Proper storage is essential to keep your Injera soft, fresh, and flavorful. Injera tends to dry out quickly if not stored correctly, so knowing the best methods will help you enjoy it longer.
Room Temperature Storage
- Injera can be kept at room temperature for 1–2 days.
- Place the flatbread in a clean container or cover it with a cloth to retain moisture.
- Ideal for daily consumption if you plan to use it quickly.
Refrigeration
- Store Injera in the refrigerator for up to 1 week.
- Wrap it tightly in plastic wrap or place it in an airtight container to prevent drying out.
- When ready to serve, gently reheat on a pan or steamer to restore softness.
Freezing
- For long-term storage, Injera can be frozen for up to 3 months.
- Freeze individual layers or stack them with parchment paper in between to prevent sticking.
- Thaw at room temperature or reheat gently before serving.
Tips to Maintain Softness
- Avoid microwaving, as it can dry out the bread.
- Always cover Injera while cooling to lock in moisture.
- Store in a slightly humid environment if possible to retain the spongy texture.
Quick Reference Table for Storage
| Storage Method | Duration | Tips |
|---|---|---|
| Room Temperature | 1–2 days | Keep covered with a clean cloth |
| Refrigerator | Up to 1 week | Wrap tightly in plastic or airtight container |
| Freezer | Up to 3 months | Freeze individually; separate layers with parchment paper |
By following these storage techniques, you can ensure your Injera stays soft and fresh, ready to enjoy with your favorite Ethiopian dishes anytime.
FAQ – Injera Recipe
Q1: What is the best flour for Injera recipe?
A: Traditional teff flour is best, offering authentic flavor and natural gluten-free properties.
Q2: How long does it take to make Injera?
A: Including fermentation, it takes around 24–48 hours.
Q3: Can I make Injera without teff flour?
A: Yes, a mix of all-purpose or sorghum flour works, though flavor and texture will differ.
Q4: How do I keep Injera soft after cooking?
A: Cover it while cooling and store in a sealed container or wrapped in a clean cloth.
Q5: Is Injera gluten-free?
A: Authentic Injera made from 100% teff is naturally gluten-free.
Conclusion
Making Injera at home doesn’t have to be intimidating. By following these 7 easy tips, using high-quality ingredients, and practicing proper technique, you can create Ethiopian flatbread that’s soft, spongy, and full of flavor. Whether you’re serving it with traditional stews or experimenting with modern fillings, homemade Injera adds a touch of authenticity and joy to your meals.

Call-to-Action: Now it’s your turn—gather your ingredients, follow these steps, and experience the magic of freshly made Injera. Don’t forget to share your creations with friends and family, and bring the taste of Ethiopia right to your kitchen!