
Bake a Fluffy Loaf with a Chocolate Swirl That Everyone Will Love
Table of Contents
Have you ever walked into a kitchen and been instantly greeted by the rich, comforting aroma of chocolate wafting through the air? There’s something about the smell of freshly baked bread intertwined with chocolate that creates a sense of warmth, comfort, and pure delight. Baking a loaf with a chocolate swirl isn’t just about creating a delicious treat—it’s about crafting a moment, a memory, and an experience you can share with your family and friends.

In this article, you’ll learn how to bake a fluffy chocolate swirl loaf that melts in your mouth, how to master the swirl technique, and tips for perfecting your creation. Whether you’re a beginner or an experienced baker, this guide is designed to make the process simple, enjoyable, and incredibly rewarding.
What is a Loaf with a Chocolate Swirl?
A loaf with a chocolate swirl is more than just a dessert or snack. It’s a type of sweet bread, soft and airy, with rich chocolate ribbons running through it. While it shares some similarities with Babka—a traditional braided bread with chocolate or cinnamon—the chocolate swirl loaf is simpler, easier to make, and perfect for everyday indulgence.
Key Characteristics:
- Texture: Soft, fluffy, and light.
- Flavor: Sweet with distinct chocolate layers.
- Appearance: Beautiful ribbons of chocolate visible throughout the loaf.
- Occasion: Perfect for breakfast, brunch, dessert, or a cozy snack.
You can even compare it to chocolate rolls or buns, but what sets the swirl loaf apart is the evenly distributed chocolate patterns that create a visually appealing and flavorful bite every time.
Table: Chocolate Swirl Bread vs. Babka vs. Chocolate Bread Rolls
| Bread Type | Texture | Flavor | Ideal Occasion |
|---|---|---|---|
| Chocolate Swirl Loaf | Soft, fluffy | Sweet chocolate ribbons | Breakfast, snack, dessert |
| Babka | Dense, rich | Chocolate or cinnamon | Special occasions |
| Chocolate Bread Rolls | Soft, airy | Mild chocolate | Snacks, lunchboxes |
Ingredients Needed for a Fluffy Chocolate Swirl Loaf
When it comes to baking a loaf with a chocolate swirl, the ingredients you choose can make all the difference between a dense, dry loaf and one that is soft, fluffy, and indulgent. Using high-quality ingredients and understanding their roles in the recipe is key to achieving the perfect texture and rich chocolate flavor. Here’s a complete breakdown of what you’ll need:
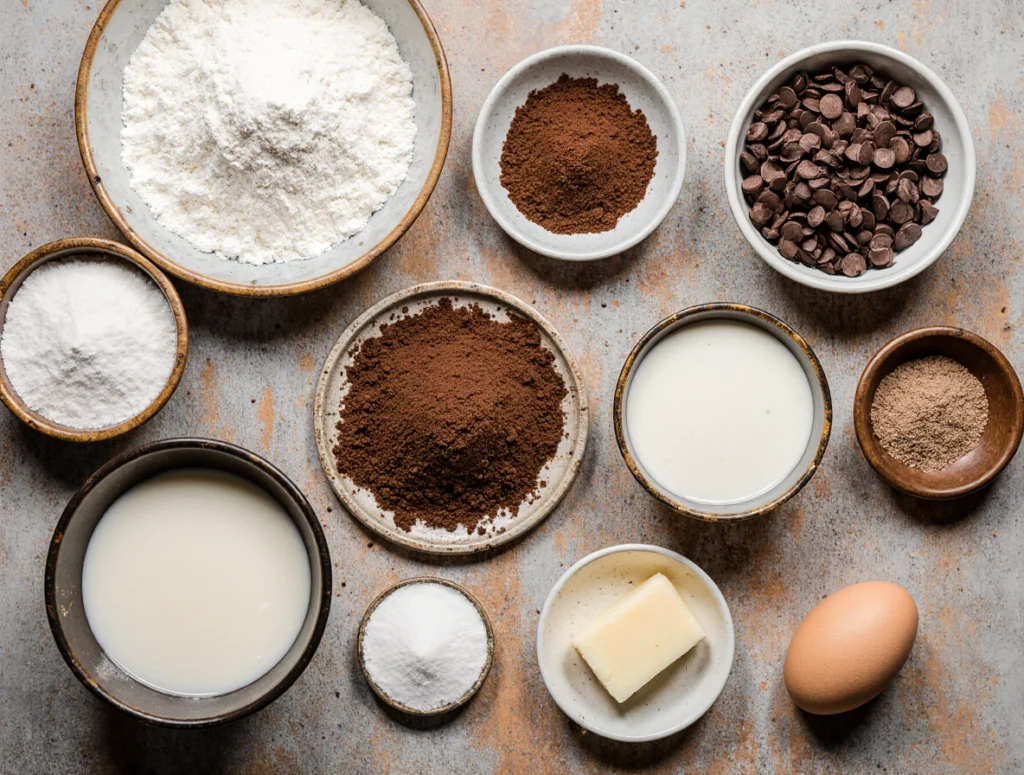
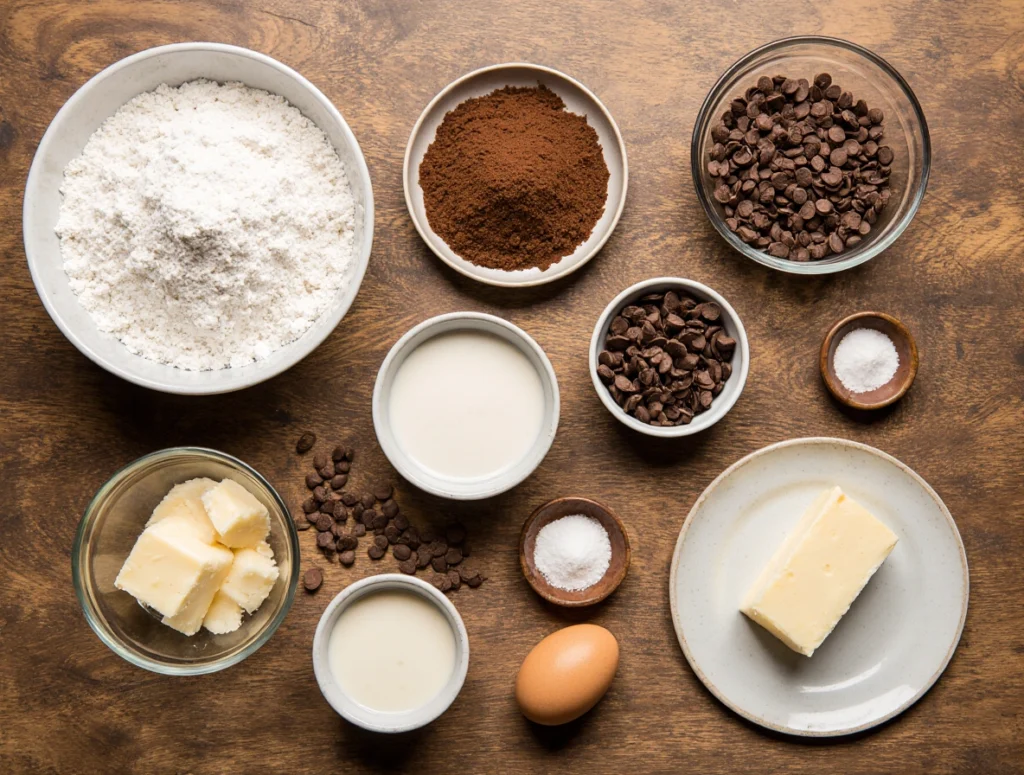
Essential Ingredients
| Ingredient | Quantity | Purpose & Tips |
|---|---|---|
| All-purpose flour | 3 cups | Provides structure for your loaf. Sifted flour helps create a light, airy texture. |
| Sugar | ½ cup | Adds sweetness and helps caramelize the crust for a golden finish. Adjust based on your taste preference. |
| Active dry yeast | 2 ¼ tsp | Yeast is crucial for the rise, giving your loaf its fluffy texture. Make sure it’s fresh and not expired. |
| Warm milk | 1 cup | Activates the yeast and adds moisture. Ensure the milk is warm, not hot, to prevent killing the yeast. |
| Butter | ¼ cup | Adds richness, tenderness, and flavor to the dough. Use softened butter for smooth incorporation. |
| Salt | 1 tsp | Enhances flavor and balances sweetness. |
| Cocoa powder | ½ cup | Creates the chocolate swirl. Use unsweetened cocoa for a deep, rich chocolate flavor. |
| Chocolate chips | ½ cup | Optional but adds pockets of melted chocolate within the swirl for extra indulgence. |
Optional Add-ons for Extra Flavor and Texture
Adding complementary ingredients can elevate your loaf, creating unique variations that appeal to different tastes:
- Chopped nuts: Walnuts, pecans, or hazelnuts add a pleasant crunch.
- Dried fruits: Raisins, cranberries, or chopped dates provide bursts of sweetness and texture.
- Flavored extracts: A splash of vanilla or almond extract enhances the overall aroma and taste.
- Spices: A pinch of cinnamon or espresso powder can intensify the chocolate flavor.
Ingredient Tips for Maximum Fluffiness
- Measure accurately – Baking is precise; too much flour can make the loaf dense.
- Use fresh yeast – Ensure it’s active for optimal rise.
- Quality chocolate – High-quality cocoa powder and chocolate chips deliver a richer flavor.
- Room temperature ingredients – Bring butter, milk, and eggs (if used) to room temperature for smoother dough and better rise.
- Do not overmix – Gentle kneading keeps the dough airy and prevents toughness.
By carefully selecting and preparing your ingredients, you’re laying the foundation for a loaf with a chocolate swirl that is soft, fluffy, and irresistibly chocolatey. These details also help your content rank better for related keywords like chocolate bread rolls, chocolate twister bread, and how to make a chocolate swirl because you’re naturally including descriptive, informative text that aligns with search intent.
Step-by-Step Guide to Making a Loaf with a Chocolate Swirl
Baking a loaf with a chocolate swirl might seem intimidating at first, but following a clear, step-by-step approach makes it simple, fun, and rewarding. Here’s everything you need to know to create a soft, fluffy, and chocolatey loaf.

Step 1 – Preparing the Dough
The foundation of a fluffy chocolate swirl loaf lies in well-prepared dough.
- In a large mixing bowl, combine all-purpose flour, sugar, and salt. Mix thoroughly to distribute the ingredients evenly.
- Warm milk to about 110°F (43°C). Stir in active dry yeast and let it sit for 5–10 minutes until frothy to ensure your yeast is active.
- Add the yeast-milk mixture and softened butter to the dry ingredients. Mix until a rough dough forms.
- Knead the dough for 8–10 minutes by hand or with a stand mixer until smooth and elastic. The dough should be soft, slightly tacky, but not sticky.
Tips for Perfect Dough:
- Avoid adding too much flour during kneading to keep the loaf light.
- Knead gently to maintain air pockets for fluffiness.
- Let the dough rest covered for 1–2 hours until doubled in size.
Step 2 – Creating the Chocolate Swirl
The chocolate swirl is what makes this loaf special, giving it a visually appealing and delicious flavor.
- Mix cocoa powder with a tablespoon of softened butter and sugar to create a smooth chocolate paste. Fold in chocolate chips for pockets of melted chocolate.
- Once the dough has risen, gently punch it down and roll it into a rectangle approximately 12×8 inches.
- Spread the chocolate mixture evenly over the surface of the dough, leaving a small border around the edges.
- Carefully roll the dough from one short end to the other to form a tight log. Pinch the edges to seal.
- For a beautiful swirl pattern, slice the log lengthwise and twist the two halves together to expose the chocolate layers.
Pro Tip: Twisting or braiding enhances the visual appeal, making your loaf look bakery-quality.
Step 3 – Proofing the Loaf
After shaping, let your loaf rest and rise again.
- Place the twisted or braided loaf into a greased or parchment-lined loaf pan.
- Cover loosely with a towel or plastic wrap and let it rise for 30–45 minutes, until slightly puffed.
- This second proofing ensures your loaf stays soft and fluffy during baking.
Step 4 – Baking the Loaf
- Preheat your oven to 350°F (175°C).
- Brush the top of the loaf lightly with an egg wash (1 beaten egg with a teaspoon of water) for a shiny, golden crust.
- Bake the loaf for 30–40 minutes, or until the top is golden brown and a toothpick inserted in the center comes out clean or with melted chocolate.
Tips for Perfect Baking:
- Rotate the pan halfway through baking for even browning.
- If the top browns too quickly, loosely cover it with foil.
- Let the loaf cool in the pan for 10 minutes, then transfer to a wire rack to cool completely.
Step 5 – Serving and Enjoying
- Slice your loaf with a chocolate swirl slightly warm for soft, melty chocolate bites.
- Serve with coffee, tea, or milk for breakfast, snack, or dessert.
- Store leftovers in an airtight container at room temperature for 2–3 days or freeze up to 1 month. Reheat in the oven for 5–10 minutes to restore fluffiness.
Optional Presentation Tips:
- Dust with powdered sugar for a café-style look.
- Serve slices with a drizzle of chocolate or a side of whipped cream for extra indulgence.
Tips for Achieving the Perfect Fluffy Loaf
- Use Warm Milk: Ensures proper yeast activation.
- Don’t Over-Knead: Maintain air pockets for fluffiness.
- Let Dough Rest: Allow full rise for better texture.
- Egg Wash Finish: Gives a shiny, appetizing crust.
- Extra Chocolate Swirl: Layer chocolate mixture generously for a striking visual effect.


Serving Suggestions and Storage Tips
Once your loaf with a chocolate swirl is baked to perfection, serving and storing it correctly will ensure every slice stays soft, flavorful, and indulgent.
Serving Suggestions:
- Slice your loaf slightly warm to enjoy the soft, melty chocolate swirls in every bite.
- Pair it with a hot cup of coffee, tea, or a glass of cold milk for a comforting breakfast or snack.
- Add a dusting of powdered sugar on top for a visually appealing, bakery-style finish.
- For extra indulgence, serve slices with a drizzle of chocolate sauce, caramel, or a dollop of whipped cream.
- Turn leftover slices into breakfast toast with a thin layer of butter or hazelnut spread.
Creative Serving Ideas:
- Use slices to make decadent chocolate swirl bread pudding.
- Toast and layer with cream cheese and fresh strawberries for a dessert twist.
- Create mini sandwiches using chocolate swirl bread for a fun snack option for kids.
Storage Tips:
- At room temperature: Store the loaf in an airtight container or wrapped tightly in plastic wrap for 2–3 days to maintain freshness.
- Freezing: Wrap the loaf in foil or plastic wrap and freeze for up to 1 month. When ready to enjoy, thaw at room temperature and reheat slightly in the oven for a soft, freshly baked texture.
- Sliced Storage: If you slice your loaf before storing, separate slices with parchment paper to prevent sticking.
- Reheating: Warm slices in the oven at 300°F (150°C) for 5–10 minutes, or in the microwave for 15–20 seconds, to bring back the soft, fluffy texture and melt the chocolate swirls slightly.
By following these tips, you can maximize the shelf life of your chocolate swirl loaf while keeping it moist and flavorful. Plus, these serving ideas ensure every bite is enjoyable, whether for breakfast, a snack, or dessert.
Variations to Try
Once you’ve mastered the classic loaf with a chocolate swirl, experimenting with different flavors and textures can take your baking to the next level. These variations allow you to customize your loaf to suit your taste, occasion, or dietary needs.

Chocolate and Nut Combinations:
- Add chopped walnuts, pecans, or hazelnuts to the chocolate swirl for a satisfying crunch in every bite.
- Mix almond butter or peanut butter into the chocolate filling to create a rich, nutty flavor profile.
- Sprinkle toasted nuts on top before baking for extra texture and a professional look.
Alternative Chocolate Swirls:
- White chocolate: Replace half of the cocoa paste with melted white chocolate for a visually striking swirl and a sweet, creamy taste.
- Caramel or dulce de leche: Swirl a layer of caramel with the chocolate for a decadent, gooey surprise.
- Dark chocolate: Use high-cocoa dark chocolate for a richer, slightly bitter flavor that balances the sweetness of the bread.
Fruit-Infused Variations:
- Dried fruits: Fold in raisins, cranberries, or chopped dates into the chocolate swirl for bursts of sweetness.
- Fresh berries: Add a few blueberries or raspberries before baking for a fruity contrast.
- Citrus zest: A hint of orange or lemon zest in the dough can brighten the chocolate flavor.
Mini Loaves or Rolls:
- Create individual chocolate swirl rolls for snack-sized treats that are perfect for kids or lunchboxes.
- Mini loaves can bake faster, making them ideal for quick baking sessions or gifts.
Dietary Adaptations:
- Gluten-free: Substitute all-purpose flour with a gluten-free flour blend designed for yeast bread. You may need to slightly adjust the liquid for consistency.
- Vegan: Use plant-based milk and vegan butter, and replace eggs (if used) with flax or chia eggs to maintain texture and rise.
Creative Presentation Ideas:
- Drizzle a chocolate glaze over the baked loaf for a stunning finish.
- Sprinkle powdered sugar or cocoa on top for a simple but elegant look.
- Serve slices layered with cream cheese or Nutella for a decadent dessert option.
Frequently Asked Questions (FAQ)
Baking a loaf with a chocolate swirl can raise several questions, especially if it’s your first time. Here are some of the most common concerns and tips to help you succeed.
How long does a loaf with a chocolate swirl stay fresh?
Your freshly baked loaf will stay soft and flavorful for 2–3 days at room temperature if stored in an airtight container. For longer storage, wrap it tightly in foil or plastic wrap and freeze for up to 1 month. Reheat slices in the oven or microwave before serving to restore the soft, fluffy texture.
Can I make a chocolate swirl loaf without yeast?
Yes, you can create a quick chocolate swirl bread using baking powder instead of yeast. Keep in mind the texture will be slightly denser and less airy, but it’s a great option if you’re short on time or prefer not to wait for dough to rise.
How can I make the chocolate swirl more pronounced?
To achieve a more visible swirl, roll your dough evenly into a rectangle and spread the chocolate mixture generously. Twisting or braiding the loaf before baking also enhances the visual effect, making the chocolate layers stand out beautifully in every slice.
Is this recipe suitable for beginners?
Absolutely! The recipe’s step-by-step instructions and simple techniques make it beginner-friendly. Even if it’s your first time baking a chocolate swirl loaf, you can achieve a soft, fluffy, and visually appealing bread with a little patience.
Can I add nuts or fruits to the loaf?
Yes, adding chopped nuts, dried fruits, or even fresh berries is a great way to customize your loaf. These additions not only enhance flavor but also create textural contrast that makes each bite more enjoyable.
How do I store leftover slices?
If you slice the loaf before storing, separate slices with parchment paper to prevent sticking. Store in an airtight container at room temperature for a few days or freeze slices individually for up to a month. Reheat before serving to enjoy them soft and fresh.
What is the best way to reheat a chocolate swirl loaf?
For best results, warm slices in the oven at 300°F (150°C) for 5–10 minutes or microwave for 15–20 seconds. This restores the soft, fluffy texture and slightly melts the chocolate for an indulgent experience.
Conclusion
Baking a loaf with a chocolate swirl is more than just making bread—it’s creating an experience. The soft, fluffy texture, combined with rich chocolate ribbons, makes every bite a moment of joy. By following this guide, you’ll not only master the art of chocolate swirl bread but also bring warmth, comfort, and smiles to those you share it with.
Now it’s your turn: grab your ingredients, follow the steps, and create a loaf with a chocolate swirl that everyone will fall in love with. Share your masterpiece with family and friends, and enjoy the delicious rewards of your baking journey!