Easy Halloween Rice Krispie Treats for Kids – Fun and Spooky Recipes
Table of Contents
Halloween isn’t just about costumes, spooky decorations, and trick-or-treating. Some of the most magical moments happen in the kitchen, making memories with your kids while creating fun, festive treats. There’s something incredibly special about little hands shaping gooey marshmallow treats into pumpkins, ghosts, and monsters — the joy, the laughter, and the shared creativity.
These Easy Halloween Rice Krispie Treats for Kids are the perfect combination of fun, flavor, and festivity. Whether you’re a busy parent looking for a quick recipe or a family wanting to start a Halloween baking tradition, these treats will delight your kids and guests alike. Let’s dive into the ultimate guide to making these spook-tacular desserts!

Why Halloween Rice Krispie Treats Are Perfect for Kids
Halloween is all about fun, creativity, and a little bit of spooky excitement. When it comes to desserts, Halloween Rice Krispie Treats check all the boxes — they’re simple, festive, and perfect for little hands. Here’s why:
1. Quick and Easy to Make
- Most recipes take just 15–20 minutes, making them perfect for busy parents or last-minute party prep.
- No complicated baking skills are required — even kids can help with mixing, shaping, and decorating.
2. Safe for Kids to Participate
- Unlike cookies or cakes that require an oven, Rice Krispie Treats use melted marshmallows and cereal, which is safer for children.
- Kids can get creative with shapes and decorations without the risk of burns from an oven.
3. Fun and Creative Shapes
- Rice Krispie Treats are easily moldable, allowing kids to make:
- Pumpkins 🍊
- Ghosts 👻
- Monsters and Frankensteins 🟢
- Using candy eyes, chocolate chips, or icing allows kids to customize their treats, making baking an interactive experience.
4. Affordable and Accessible Ingredients
- Only a few pantry staples are needed: Rice Krispies, marshmallows, butter, and candy decorations.
- No expensive or exotic ingredients, making it easy to make multiple batches for parties or school events.
5. Encourages Family Bonding
- Baking these treats is more than cooking — it’s a fun family activity.
- Kids learn about measuring, mixing, and decorating, while parents enjoy quality time and making lasting Halloween memories.
Pro Tip: Set up a little “decorating station” with bowls of candy, icing, and sprinkles. Kids love personalizing their Rice Krispie Treats, and it keeps them engaged throughout the process.
Essential Ingredients for Easy Halloween Rice Krispie Treats
Core Ingredients
| Ingredient | Quantity | Notes |
|---|---|---|
| Rice Krispies cereal | 6 cups | Base of the treats |
| Marshmallows | 4 cups | Mini or large, melted |
| Butter | 3 tbsp | Unsalted, for smooth melting |
| Food coloring | Various colors | Orange, green, black for Halloween |
| Candy decorations | As needed | Eyes, chocolate chips, sprinkles |
Optional Ingredients for Decoration
- Chocolate chips or chocolate melts for eyes and mouths
- Colored sugar or sprinkles for festive touch
- Candy eyeballs for spooky faces
- Pretzel sticks for mummies, monsters, or fun textures
Step-by-Step Guide to Making Halloween Rice Krispie Treats
Creating Halloween Rice Krispie Treats for kids is easy, fun, and rewarding. Follow this step-by-step guide to make delicious, festive treats that will delight everyone.
Step 1 – Prepare Your Ingredients and Workspace
Before you start:
- Measure all ingredients accurately:
- 6 cups Rice Krispies cereal
- 4 cups marshmallows
- 3 tablespoons unsalted butter
- Food coloring (orange, green, black)
- Candy decorations like candy eyes, chocolate chips, and sprinkles
- Line a 9×13-inch pan or baking sheet with wax paper to prevent sticking.
- Set up a decorating station with bowls of candies, icing, and tools.
- Tip: Prepping everything first makes the process smooth and fun, especially with kids involved.
Step 2 – Melt Butter and Marshmallows
- Place butter in a large non-stick saucepan over medium heat.
- Once melted, add marshmallows and stir continuously until the mixture becomes smooth and creamy.
- Remove from heat immediately to prevent burning.
- Optional: Add a few drops of vanilla extract for extra flavor.
Tip: Use a silicone spatula to stir — it prevents sticking and makes scraping the pan easier.
Step 3 – Mix in Rice Krispies
- Add the Rice Krispies cereal gradually to the melted marshmallow mixture.
- Stir quickly and gently until every piece is coated evenly.
- Work fast: the mixture sets quickly once it cools.
Tip: Lightly butter your hands if you plan to shape treats by hand.
Step 4 – Color and Shape the Treats
- Divide the mixture into separate bowls if you want multiple colors.
- Add a few drops of food coloring (orange for pumpkins, green for monsters, black for spooky effects) and mix well.
Shaping Ideas:
- Pumpkins: Round orange shapes with small green candy stems
- Ghosts: White ovals with black candy eyes
- Monsters/Frankenstein: Green rectangles or squares with chocolate/marshmallow eyes
Tip: Use cookie cutters or molds to make shapes more uniform. Kids love pressing out shapes!
Step 5 – Decorate Your Treats
- Use candy eyes, sprinkles, chocolate chips, or icing to add faces and fun details.
- Press decorations gently to avoid squishing the treats.
- Optional: Add edible glitter or colored sugar for extra sparkle.
Pro Tip: Let treats cool completely before serving or storing to maintain their shape and texture.
Step 6 – Serve and Enjoy
- Arrange the treats on a festive Halloween platter.
- Perfect for parties, school events, or Halloween movie nights.
- Encourage kids to show off their creations — it’s part of the fun!
Tip: Store leftovers in an airtight container at room temperature for up to 3–4 days.
This step-by-step section is:
- Highly readable with H3 subheadings
- Includes practical tips and tricks for kids and parents
- Optimized for the keyword “Halloween Rice Krispie Treats”
- Structured for scannability, which is great for SEO
Tips for Perfect Halloween Rice Krispie Treats
1. Use Wax Paper or Parchment Paper
- Line your pan or baking sheet with wax paper or parchment paper to prevent sticking.
- Tip: Lightly butter the paper for even easier removal of treats.
2. Don’t Overcook the Marshmallows
- Melt marshmallows on medium heat and stir constantly.
- Overheating can make them tough or sticky, which makes shaping difficult.
3. Involve Kids in Decorating
- Let children shape and decorate treats with candy eyes, sprinkles, and icing.
- Decorating is the most fun part for kids and encourages creativity.
4. Shape Quickly
- The mixture sets fast, so shape treats while warm.
- Tip: Use lightly buttered hands or cookie cutters to create uniform shapes.
5. Store Properly
- Store finished treats in an airtight container at room temperature for 3–4 days.
- Avoid refrigerating — it can make treats hard and less enjoyable.
6. Experiment with Colors and Themes
- Use food coloring to create a variety of Halloween-themed treats:
- Orange for pumpkins 🎃
- Green for monsters 🟢
- White for ghosts 👻
- Add small candy decorations like eyes, chocolate chips, or colored sugar for more festive flair.
7. Portion Control for Parties
- Make mini-sized treats for parties or classroom events.
- Tip: Use mini cupcake liners or cut treats into small shapes for easier serving.
8. Optional Flavor Boosters
- Add vanilla extract or a dash of cinnamon to the marshmallow mixture for extra flavor.
- Sprinkle edible glitter or colored sugar to make treats sparkle and appeal to kids.
Pro Tip: Planning ahead and setting up a decorating station with all candy and tools ready makes the process smoother, more fun, and less messy — perfect for little hands!
Fun Variations for Kids
One of the best things about Halloween Rice Krispie Treats is how easy it is to get creative. From spooky monsters to cute pumpkins, kids love turning the simple base into imaginative treats. Here are some fun variations to try:
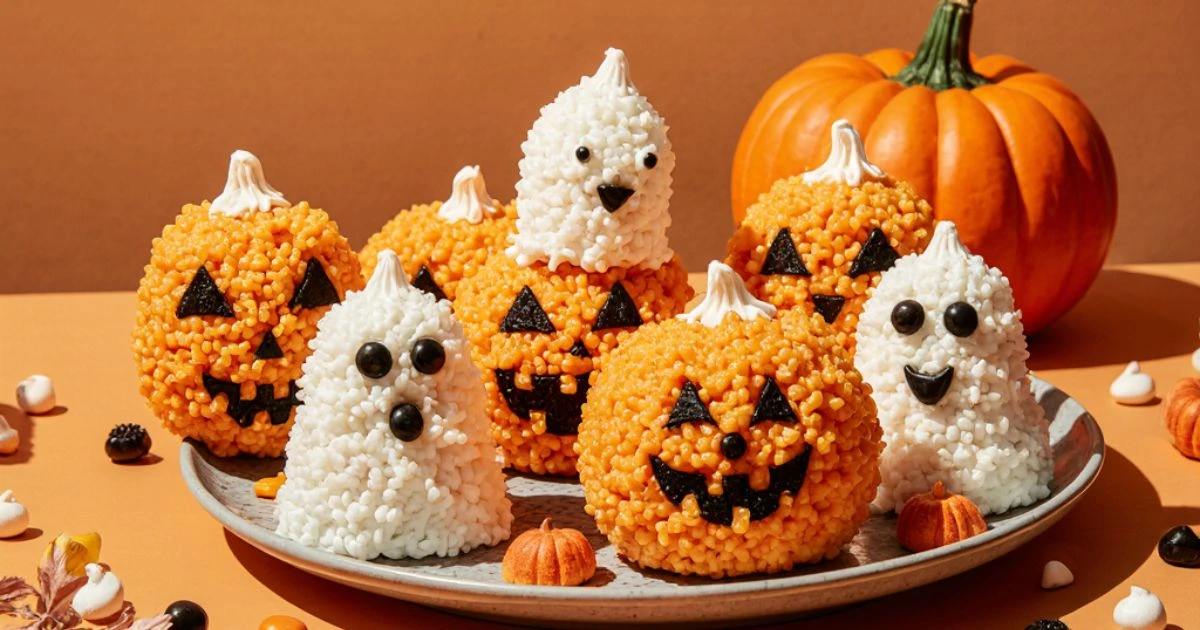
1. Pumpkin Patch Treats


- Color Rice Krispie mixture orange using food coloring.
- Shape into small round pumpkins.
- Use green candy stems (gumdrops, icing, or fondant).
- Optional: Draw pumpkin lines with icing or melted chocolate.
2. Mummy Treats
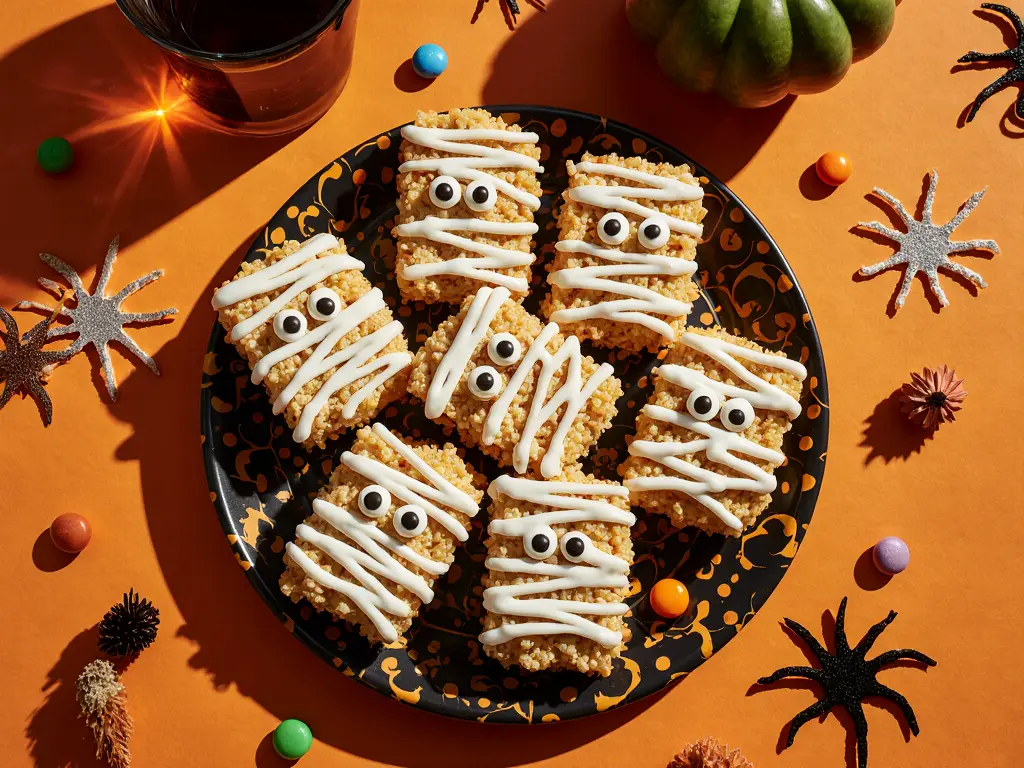

- Keep Rice Krispies white.
- Shape into small rectangles or cylinders.
- Wrap thin lines of white icing around the treat to mimic mummy bandages.
- Add candy eyes peeking through the “bandages.”
3. Monster or Frankenstein Treats
- Tint Rice Krispies green with food coloring.
- Shape into squares or rectangles for Frankenstein, or irregular shapes for fun monsters.
- Use chocolate chips, candy eyes, and icing to create faces.
- Optional: Add small candy pieces or pretzel sticks for arms and hair.
4. Ghost Treats
- Keep treats white.
- Shape into simple ghost-like forms: rounded or teardrop shapes.
- Draw black candy eyes and mouth with icing or edible markers.
5. Spooky Variety Platter
- Mix multiple shapes and colors for a Halloween-themed platter.
- Combine pumpkins, ghosts, monsters, and mummies for visual appeal.
- Sprinkle with colored sugar, edible glitter, or candy stars for extra festive flair.
Quick Reference Table: Fun Variations for Kids
| Variation | Color | Shape / Design | Decorations |
|---|---|---|---|
| Pumpkin Patch | Orange | Round | Green candy stems, icing lines |
| Mummy Treats | White | Rectangles/Cylinders | Icing bandages, candy eyes |
| Monster / Frankenstein | Green | Square / irregular | Candy eyes, chocolate chips |
| Ghost Treats | White | Rounded / teardrop | Black icing eyes/mouth |
| Spooky Variety Platter | Multi-color | Mixed shapes | Sprinkles, candy, edible glitter |
Pro Tip: Encourage kids to mix and match decorations for unique creations. A decorating station with candy eyes, sprinkles, and icing pens makes this activity interactive, fun, and educational — perfect for a Halloween afternoon!
FAQ – Halloween Rice Krispie Treats for Kids
Can kids make these treats by themselves?
Yes! With supervision during the melting steps, kids can safely help shape and decorate the treats.
How long do Halloween Rice Krispie Treats last?
Store them in an airtight container at room temperature for 3–4 days. Avoid refrigerating to keep them soft.
Can I make these gluten-free?
Absolutely! Use gluten-free Rice Krispies or any gluten-free crispy rice cereal.
Can I make them ahead of time?
Yes, you can prepare these treats a day in advance. Store in an airtight container at room temperature to maintain freshness.
What are some alternative decorations?
Sprinkles, candy eyes, chocolate melts, pretzel sticks, colored icing — let your creativity run wild!
Conclusion
Making Halloween Rice Krispie Treats for Kids is more than just a recipe — it’s a memory-making activity that brings families together. With just a few simple ingredients, a little creativity, and a pinch of Halloween magic, you can create fun, festive, and delicious treats that your kids will love.
Whether you stick to pumpkins and ghosts or invent your own spooky monsters, these treats are guaranteed to bring smiles and laughter.
Call to Action:
“Gather your ingredients, involve the kids, and create your very own batch of easy Halloween Rice Krispie Treats this season — because the best Halloween memories are the ones made in the kitchen!”