
Homemade New York Style Bagel Recipe (Using All-Purpose Flour)
Table of Contents
The Smell of a New York Morning
If you’ve ever wandered through a New York street early in the morning, you probably remember that warm, slightly sweet aroma drifting from corner bakeries — that unmistakable scent of freshly boiled and baked bagels. It’s one of those little joys that can stop you in your tracks. The glossy crust, the soft yet chewy bite, the subtle malted flavor — it’s comfort and character rolled into one perfect ring.
Now, imagine being able to create that same magic in your own kitchen — no fancy bakery setup, no imported flour, just simple ingredients and a bit of patience. This guide is going to show you exactly how to make authentic New York style bagels at home using nothing more than all-purpose flour, a pot of boiling water, and your own two hands.
By the time you’re done reading, you’ll not only understand the “why” behind every step, but you’ll also know how to customize your bagels — from plain and sesame to everything-seasoned beauties that belong in a Manhattan café window.
What Makes a New York Style Bagel So Special?
Before diving into dough and yeast, it helps to know what makes New York bagels different from the rest. You might’ve noticed that bagels from different regions don’t all taste the same. Some are dense and bready, others too soft — but a true New York bagel hits that delicate balance between chewiness and tenderness.
Here’s what sets them apart:
- Boiled before baking: This crucial step gives the bagel its signature crust — shiny, firm, and perfectly chewy.
- Malted sweetness: Traditional New York recipes use barley malt syrup for that light, nostalgic flavor you just can’t fake.
- High-gluten structure: Though bread flour is often used, you can still achieve that ideal bite using all-purpose flour with proper kneading and boiling.
- Distinct texture: The outside is firm and golden, while the inside remains soft and slightly dense — a contrast that defines the NYC experience.
The bagel, in fact, has a story. It traveled from Eastern Europe with Jewish immigrants in the late 1800s and found its true fame in New York’s bakeries. Over time, those bakers perfected the technique that transformed a simple dough ring into a breakfast icon.
And now, you’re about to carry that tradition into your kitchen.
Essential Ingredients for Perfect Homemade Bagels
You don’t need special bakery flour or professional equipment to make these — just simple pantry ingredients and a little technique.
Bagel Recipe Ingredients Table (All-Purpose Flour Edition)
| Ingredient | Quantity | Purpose |
|---|---|---|
| All-purpose flour | 4 cups | Forms the dough structure |
| Warm water | 1 ¼ cups | Activates yeast and hydrates flour |
| Instant yeast | 2 ¼ tsp (1 packet) | Helps dough rise |
| Sugar | 2 tbsp | Feeds the yeast and balances flavor |
| Salt | 1 ½ tsp | Enhances taste |
| Barley malt syrup or honey | 1 tbsp | Adds subtle sweetness and shine |
| Egg wash (optional) | 1 | Creates glossy golden crust |
Ingredient Notes:
- If you can’t find barley malt syrup, honey is a perfect backup — it lends warmth and sweetness to the crust.
- Make sure your water is lukewarm, not hot — around 105°F (40°C) is perfect for yeast.
- Always measure your flour correctly by spooning it into the cup and leveling it off.
Step-by-Step New York Bagel Recipe Instructions
Bagel-making looks complicated at first glance, but once you go through the process, it becomes second nature. Let’s break it down clearly so you can follow along without stress.


Step 1: Make the Dough
- In a large bowl, mix warm water, sugar, and yeast. Wait about 5 minutes until it starts to foam — that’s your yeast waking up.
- Add the flour and salt. “Stir with a wooden spoon until a rough dough begins to form.”
- Turn it out onto a lightly floured surface and knead for about 10 minutes. The dough should feel smooth and elastic, not sticky.
“Knead with a stand mixer on medium speed for 6 to 7 minutes.”
Cover the dough with a damp towel and let it rise in a warm place for about an hour, or until it doubles in size.
Step 2: Shape the Bagels
- “After the dough has risen, gently deflate it by pressing down to release the air bubbles.”
- Divide it into 8 equal pieces — a kitchen scale helps keep them uniform.
- Roll each piece into a ball.
- Poke a hole through the center using your finger, then gently stretch it into a 2-inch ring.

Lay the shaped bagels on a parchment-lined baking sheet and let them rest for 10–15 minutes while you prepare the boiling water.
Step 3: Boil and Bake — The New York Secret
This is the defining step that gives bagels their distinctive crust.

- Fill a large pot with water and bring it to a rolling boil. “Stir in a tablespoon of honey or barley malt syrup.”
- Drop 2–3 bagels into the boiling water at a time. Boil each side for about 45–60 seconds.
- Remove with a slotted spoon and place them back on the baking sheet.
Boiling gelatinizes the outer layer, locking in moisture while building that chewy, glossy finish.
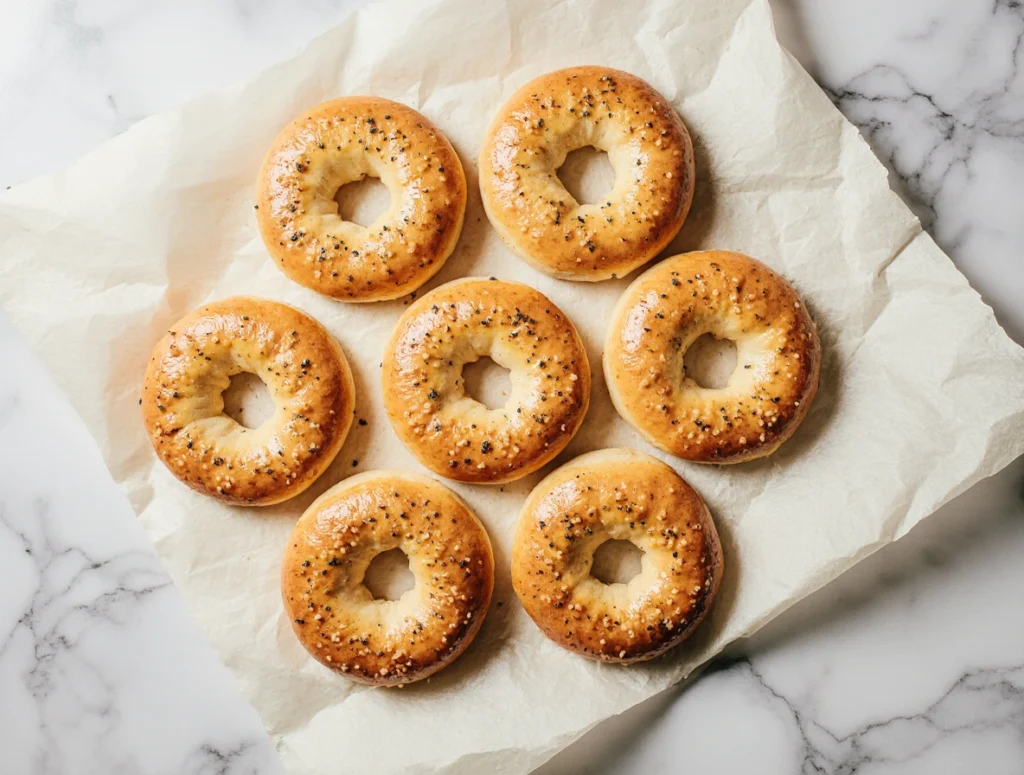
After boiling, brush each bagel with egg wash and sprinkle with toppings if you like — sesame seeds, poppy seeds, or everything seasoning.
Bake at 425°F (220°C) for 20–25 minutes, until golden brown.

Step 4: Cooling and Serving
Transfer the bagels to a wire rack and let them cool for at least 10 minutes before slicing.
When you finally cut into one, you’ll notice that satisfying resistance before your knife glides through the soft center. Spread cream cheese, layer smoked salmon, or just enjoy it plain with butter — you’ve earned it.
Pro Tips for Authentic New York Style Texture
Hitting the Perfect Chew
- Knead the dough long enough to build gluten — that’s what creates the classic chew.
- Don’t skip the boiling step; that’s the difference between a bagel and a dinner roll.
- If your bagels feel too soft, boil them a little longer next time.
Flavor Boosting Secrets
- Use barley malt syrup if you can — it’s the subtle detail that defines real New York bagels.
- For deeper flavor, cover the shaped bagels and refrigerate overnight. Cold fermentation brings complexity and depth.
- A little steam in the oven (like placing a pan of water at the bottom) helps create a crisp, golden shell.
Common Mistakes to Avoid When Making Bagels
Even experienced bakers make a few missteps. Avoid these common traps:
- Skipping the boil – You’ll end up with plain rolls instead of chewy bagels.
- Overproofing – Too long a rise makes the dough collapse during baking.
- Too much flour – Makes the dough stiff and dense. Stick to the recipe.
- Under-kneading – Results in bagels that are flat and doughy.
A good bagel rewards patience. Take your time — that’s part of the fun.
Creative Variations to Try
Once you’ve mastered the classic version, it’s time to get creative. Bagels are incredibly versatile, and small tweaks can make each batch feel brand-new.
Classic Flavor Variations
- Everything Bagel: Mix sesame, poppy seeds, garlic, onion, and salt.
- Sesame Bagel: Lightly toasted sesame seeds for a nutty aroma.
- Cinnamon Raisin: Add cinnamon and soaked raisins to the dough for a breakfast twist.
- Onion or Garlic Bagel: Sprinkle dried onion or garlic flakes before baking.
Fun Twists
- Stuffed Bagels: Fill with cream cheese, cheddar, or jalapeños before baking.
- Mini Bagels: Perfect for kids or quick snacks.
- Whole Wheat or Sourdough: Substitute half the flour for whole wheat or use a sourdough starter for extra tang.
Each variation keeps the essence of New York bagels but lets you make them your own.
Storing and Reheating Homemade Bagels
- At room temperature: Keep them in an airtight container for 2–3 days.
- For longer storage: Freeze bagels individually in zip bags for up to 3 months.
- To reheat: Slice in half and toast, or bake for 5–7 minutes at 350°F (175°C).
Frozen bagels taste just as good when toasted — some say even better.


Frequently Asked Questions (FAQ) About Bagel Recipe
Can I make New York style bagels with all-purpose flour?
Yes! While traditional recipes call for bread flour, all-purpose flour can produce nearly the same texture when kneaded thoroughly and boiled correctly.
Why do you boil bagels before baking?
Boiling forms that smooth, glossy crust by pre-cooking the outer layer. It also seals in moisture, giving the bagel its distinct chew.
Can I make bagels without a stand mixer?
Definitely. Hand kneading gives you control over the dough’s texture. Just knead a bit longer — around 10–12 minutes.
How long should I boil each bagel?
For classic New York chewiness, boil for about a minute on each side. Longer boils make denser bagels.
What’s the best topping for homemade bagels?
The New York classics — sesame, poppy, or everything seasoning — never disappoint.
Conclusion – Bringing New York to Your Kitchen
There’s something timeless about pulling warm, golden bagels from your oven and knowing you created them from scratch. You’ve turned simple flour and water into something that connects generations of bakers — from the streets of Brooklyn to your breakfast table.
By mastering this New York style bagel recipe, you’ve learned not just a baking skill, but a tradition. You don’t need fancy flours or a city-famous bakery; you just need patience, curiosity, and the willingness to try.
Now it’s your turn — gather your ingredients, preheat your oven, and bring the taste of New York into your home. And when you take that first bite of your own homemade bagel, you’ll understand why New Yorkers guard this recipe so fiercely.
Try it this weekend, and share your bagel creations — your kitchen just became the best bakery in town.